Sidechain compression guide for music producers: How to sidechain in the top DAWs
Get to know the basics of sidechain compression in music producing and how to do it in your DAW.
As you get started producing you’ll soon begin to notice that instruments in your mix that have similar frequencies can interfere with each other, losing definition in sound. One tool available to deal with this is sidechain compression. But what exactly is it?
In this article we will look at this special production technique that has become a favourite among many producers (and is frowned upon by some). Before you go on be warned, once you know it you will never unhear it; sidechain compression is everywhere.
What is sidechain compression?
Normal compressors work independently, monitoring the level of a channel’s input and controlling the output volume of that same channel. Sidechain compression instead makes sure that a particular instrument is compressed relative to other instruments in a mix.
You can use sidechain compression to bring in sharper rhythm and more separation, making room for instruments in a dense mix. You can hear sidechain compression applied to the heavy bass frequency at 00:45 of Daft Punk’s “One More Time” as a kick drum enters the chat:
EDM producers refer to that pumping sound as “sidechain”. It’s the same basic idea as standard compression, but sidechaining triggers the compressor when a different signal gets louder – so the compressor affects one sound, but triggered by another.
It’s used when one sound in a mix needs to get quieter whilst another gets louder, much like “ducking” when music on the radio automatically reduces as the DJ begins to talk. In “One More Time” the kick drum dictates when the compressor clamps down, and the bass therefore gets compressed when the kick drum hits.
When a kick and bass play similar patterns, sidechaining makes sure the kick creates the attack, and the bass produces the sustain. It can also be used for example to make more room for a vocal in a dense mix.
Your DAW should come with a stock compressor that has a sidechain, or you can download an additional plugin. It works in two ways – the first part triggers the compressor, and the second lowers the volume. It usually gives you the ability to use high frequency and low frequency filters, so you can key in certain frequencies – and make the sidechain more sensitive to those certain frequencies.
Sidechain compression is most popular in dance and electronic music rather than genres with subtler dynamic nuances like classical or folk music.
When should you sidechain?
As we’ll explore, sidechaining can be used for a variety of purposes. The most common use of a sidechaining effect is to bring the kick drum to the forefront of the mix. By ducking other elements in the mix with each hit of the kick, it makes for an explosive thumping effect that drives a beat really hard. Listen to how the mix falls away with each kick in this track from Purity Ring.
You may use the sidechaining effect to emphasise a rhythmic swelling of volume that isn’t isolated to just pushing the kick through. Using sidechaining you can create swells in any or all of your tracks by setting it to a channel providing the rhythmic trigger you’re after. You can set your trigger to be silent in the mix meaning that it will simply provide that rise and fall of compression without actually pushing another sound in its place.
You could use sidechaining with effects modules to create some interesting automation. For example, use it with an equaliser to allow a certain frequency to push through or make space by pushing down that frequency in a crowded channel.
An often overlooked but incredibly effective use for sidechaining is to make the vocals shine. Often you want your vocals at the forefront of a track when they come in, and sidechain compression can be a very simple way of ensuring that they come to the front of the mix. This means that you can easily keep your beat and melodies loud whenever the vocals aren’t in the mix.
There is an incredible amount you can do with sidechaining when you know how. Play around with the effect and see what comes out the other side. You might find a brand new use for it!
Different ways of using sidechain effects
As we’ve covered, the primary use for sidechaining is to duck certain elements within the mix to bring another element forward, usually the kick drum. However, the method can be used in many creative ways. Here are just a few of the different ways in which you can use sidechain beyond the most common compression ducking use.
Rhythm: Using the techniques above, try sidechaining a recurring instrument or sample to create a rhythmic ducking to your track. Playing with your settings you can use a sidechain not so much to emphasise certain instruments but to emphasise a rhythmic pattern. You could even mute the instrument you’re sidechaining, allowing you to experiment with ducking without any sound needed to be pushed in those gaps.
Gate: You can set up a sidechain on a gate to open and close the gate based on the level of a track. This can allow you to push two tracks at the same time, creating a relationship between two instruments or sounds. For example, gating a bass with the kick drum allows them to push their space together, bringing them both to the front of the track when the kick hits.
Filters: Sidechain to your filter and control the parameters like the envelope and filter so that when your input comes through your sound is transformed. This can be an amazing way to make a certain track’s sound shine through on each beat.
How to sidechain in Ableton Live
- Open one of their compressor plugins on the track that you want to compress. We’ll use Glue Compressor to walk through it in this case.
- Use the toggle arrow button to select and open the Sidechain compression pane in the plugin.
- Enable the Sidechain input (this should turn it yellow).
- In the two bars under ‘Audio From’ you’ll be selecting where your external source comes from and your tapping point. Select the track that contains your signal in the top bar and then the element you want to tap in the lower menu.
- You can select the small headphones symbol between Sidechain and EQ to filter the sidechain signal and choose from 6 of the available filters. This helps to control the triggering of the compression if it’s not working as you want.
- Using the Attack, Release, Ratio, and Threshold you control exactly how the sidechain is impacting your output. For details on how this works you’ll need to look into compressors more deeply elsewhere. Our guide is a good place to start.
Chris Carter offers a great walkthrough of sidechain compression in Ableton Live on the Point Blank Music School.
How to sidechain in FL Studio
There are a few different ways to sidechain in FL Studio and the one that you choose may depend on the result that you want from using the technique. We’ll walk through how to do each of the techniques below. It’s worth getting familiar with each so that you know the differences and can decide which is best for your mix.
Sidechaining using Fruity Limiter
This technique offers the most straightforward sidechaining result, using FL Studio’s stock compression plugin: Fruity Limiter.
- Head to the track of the sound you want to duck in the mixer and apply the Fruity Limiter compressor to it.
- Head to the mixer track of the trigger sound you’ve chosen, select it, and then click the arrow at the bottom of the target mixer track.
- Select ‘Sidechain to this track’ to keep the trigger sound audible in the mix. Select ‘Sidechain to this track only’ for a “ghost trigger” which will apply the effect without the source being played in the mix.
- Open the Fruity Limiter plugin you added at the start and select ‘COMP’ at the bottom to change your control from ‘LIMIT’.
- Select the channel of your trigger sound under the ‘SIDECHAIN’ option at the bottom of the plugin.
- Lower the threshold to your required level for the sound that you want. For a proper thumping effect, we recommend taking it below 30dB.
- Raise the ratio, probably to anything higher than 1.5.
- The desired effect should now be audible and you can customise it further using the ‘ENVELOPE’ and ‘NOISE GATE’ settings to your liking.
Sidechaining using automation
This is not an easy solution and should be used for specific purposes, but it does work nonetheless. This solution is useful if you really want to customise your ducking effect or want to apply it to the effects on your track.
- Right click the volume of your track and select ‘Create automation clip’.
- Right click along the waveform to create new customisable points in the positions you want to adjust the volume.
- Drag them up and down to control the levels.
- You can copy and paste the same automation clip if it’s a repeating pattern to save customising the same.
Sidechaining using Gross Beat
This is a great way to very easily get a consistent effect if you have a simple pattern in mind for sidechaining. You can also experiment further with this plugin to get some really wild and out of the box patterns if you’re looking to get experimental.
- Add Gross Beat to the mixer track you want to sidechain.
- Select the ‘Sidechain’ option in the bottom grid on the left.
- You can then customise the automation to get the desired effect of timing and intensity.
Here’s a visual guide from In The Mix on YouTube.
How to sidechain in Cubase
- Insert a compressor on the channel you want to duck. Hit the sidechain button at the top of the plugin’s interface.
- Select the channel of the trigger sound you want to use. Go to the channel strip and head to the ‘Sends’ section on the right.
- Head down to the ‘Side-chains’ option and you should have an option to send the signal to the compressor you’ve added to your target channel.
- The link should now be made and you can edit the compressor for the desired effect on the mix.
For more inspiration check out this incredible video from Dom on the official Cubase channel with lots of cheeky sidechain secrets for a rich and expansive mix.
How to sidechain in Logic Pro
There are numerous plugins that allow you to sidechain in Logic. We’re focusing on Logic Pro X here but you shouldn’t have any trouble using this advice no matter what version of Logic you’re running.
- Set up your two instrument tracks: The one you want as a trigger sound and the recipient to be compressed by the sidechain.
- Add a compressor plugin. Logic’s stock compressors in the Dynamics section of their effects offerings will work perfectly.
- On the track you’re looking to bring down, open the compressor’s interface and head to the top right to the ‘Side Chain’ section. Click and select the input that you want to trigger the compressor for the sidechain effect.
- Adjust your settings to your desired level of impact. Use your threshold and ratio to control how much the trigger is reducing the signal by.
Here Mikael Baggström has the goods for you to nail your sidechain effect.
How to sidechain in Pro Tools
- Create a send to a bus from your trigger channel. Turn the gain on that bus up.
- Open up a compression plugin of your choice. Use an external key input to route to the bus made before.
- Go to the sidechain section of the plugin and change the source to ‘Key’.
- Adjust your compressor settings to your desired levels and your sidechaining effect should be in place.
For the most wonderfully straightforward video tutorial we’ve ever seen (why can’t every tutorial video be this simple?), here’s Production Expert on YouTube.
How to sidechain in REAPER?
There are a few ways to sidechain in REAPER and it’s not quite as straightforward as many of the DAWs above. We’ve found that explaining the process in a step by step tutorial can appear quite confusing and without a visual guide might not actually help the user to reach their outcome.
So… We’re going to hand you over to the friendly chap from White Sea Studio who will explain the process to you with a handy visual walkthrough for you to follow.
How to sidechain in Garageband
Garageband is surprisingly competent for a free music making program that comes with Apple products. It has a bunch of great instruments to play with and – once you get to grips with it – is a capable DAW, if limited.
These two techniques aren’t “true” sidechaining, but offer the desired effect. The first is for straightforward ducking using a set timing.
- Open the AutoFilter from the Filter section in Garageband’s Plug-ins.
- Set the rate to your desired ratio to decide when the audio should be ducked. Set it at 1/4 for ducking on the quarter notes, for example.
- Add your kick or whatever sound you like in the timing of the ratio you’ve set.
- Adjust your settings to get the level of ducking that you’re after.
We have a great video from Joe Markle showing you what we mean.
Alternatively, if you have an older version of Garageband you can use the ‘ducking’ feature. This is like a simple sidechain compression though you don’t have a whole lot of control over it. Sadly, Apple removed this feature in later versions but you may still have it if you haven’t updated in a few years.
- Make a kick drum track or whatever you want your trigger track to be.
- Turn on ducking from the control menu.
- Press the up arrow on that track’s ducking feature.
- Head to other tracks and select the down arrow on their ducking section to apply the effect to them.
- You can then tweak the controls to an extent to adjust your sound.
Patrick Donovan offers this guide from a few years ago to show this works.
How to sidechain in Reason
There are two key ways to sidechain within Reason and we’ll explain both below. Depending on your version of Reason, you may be limited to only one of these solutions.
- Add a compressor on the channel you want to sidechain.
- Take the parallel output from your kick or other type of trigger sound and connect it to the sidechain input of your compressor.
- Adjust the settings to get your desired effect – yep, that simple.
The other method uses the SSL Mixer’s sidechain function. This provides fewer options but requires less routing, depending on how quick a solution you’re after.
- Take the parallel out signal from the trigger sound and connect it to the dynamics of the desired sidechain channel, connecting it to the sidechain input.
- When the sidechain mode is activated the key button will light up.
- Go to the mixer, turn on the compressor, and then adjust your settings for the desired effect.
We have the lowdown from chillcomputerguy here.
How to sidechain in Studio One
There are two very straightforward ways to sidechain in Studio One which we’ll explore below.
- Add a compressor to the track you want to add the sidechain effect to.
- Bring up the mixer and select the ‘+’ icon in the channel’s Sends.
- Select the compressor you’ve just created.
- Adjust the settings for your desired intensity of the sidechain effect.
or…
- Add a compressor to your track as before.
- In the compressor, click the arrow next to the Sidechain box at the top of the compressor’s interface.
- Select your trigger track as the source. This will automatically create the send.
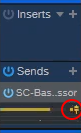
Bonus tip: Select this button next to your Send to activate the effect from the signal before it reaches the mixer. This allows you to silence the track’s output whilst still using it as a trigger effect.
Here’s Electronic Music School with a super quick visual guide to get you started.