
Record the best vocals at home: recording and mixing for beginners
You’ve been sinigng in the shower for as long as you can remember and now you’re ready to record your singing at home.
So you want to know how to record studio quality vocals at home, right? No problem, you’re in the right place.
We’re going to share with you how to prepare and where to recod your vocals at home, what you need to record professional audio, how to position your microphone and a variety of recording techniques, as well as how to mix your vocals into a song!
So let’s begin this journey so you can start recording great vocals at home!
- Preparation tips for recording vocals at home
- Everything need to record vocals at home
- Microphone positioning and recording techniques
- How to mix vocals professionally
Preparation tips for recording vocals at home
The first step to recording the best vocals at home is preparation.
Firstly, you’ll want to make sure you’ve got all lyrics memorized and how they fit with any melodies in your track.
Secondly, keep yourself hydrated. As you want to keep your vocal cords flexible, you’ll want to drink plenty of water. Furthermore, keep yourself away from dairy products like milk and chocolate, as well as any chewy, thick edibles like toffy.
And don’t smoke any cigarettes before or during the recording session Tobacco will damage your vocal cords over time anyway, so you should avoid smoking before the session.
Thirdly, do some vocal warm-ups!
Finally, make sure you’ve got a pair of closed-back monitor headphones to hand. Headphones that you know and trust are crucial tools for monitoring recordings, especially in bad acoustic spaces.
Where to record your vocals at home
The environment you record in is a HUGE thing to consider, so it’s important to determine the best place to record vocals at home.
In practice, poor acoustic spaces will send a lot of reflect sound into your microphone and affect the quality of your recording. Therefore, record somewhere with the least reflected sound because a recording environment with poor acoustics will make it difficult to capture a professional recording.
Besides that, rooms with a lot of reverb aren’t so good for all musical styles either. For example, artists singing rock, hip-hop, pop, and even EDM vocals tend to desire rooms with a “dead” sound where no natural reverb occurs.
In contrast, vocalists with more classical tastes revel in rooms abundant with reverb. Large rooms with wooden floors are rooms where reverb thrives, so if you want to experiment with these conditions then look for a space to hire.
But if you want to record in a dead space then you’ll want to find a treated room or build your own vocal booth. Better yet, if you can treat your own room then you have even more options!
But if you cannot treat your own room then your wardrobe filled with sound-absorbing clothes is your best bet.
Alternatively, creating a big pillow fort with a thick duvet is another affordable option. Like clothing, duvets provide some sound absorption and will dampen the sound of your vocals.
However, some vocalists may not sing at their best if they’re isolated away from everyone else on the track. So it’s important to make yourself comfortable as you can.
Everything you need to record vocals at home
First off, you need a microphone. I bet you didn’t see that coming…
The types of microphones
Though there are three types of mics, we’re only going to talk about condenser and dynamic microphones because ribbon microphones are an expensive option. Let’s investigate the differnt types of mics and see which is best for recording vocals.
Dynamic microphones
A dynamic mic is a type of microphone capable of capturing loud sound sources.
These microphones have a diaphragm that oscillates back and forth in relation to the strength of the incoming sound wave. Then a coil that is attached to the diaphragm oscillates – with the diaphragm – over a magnet.
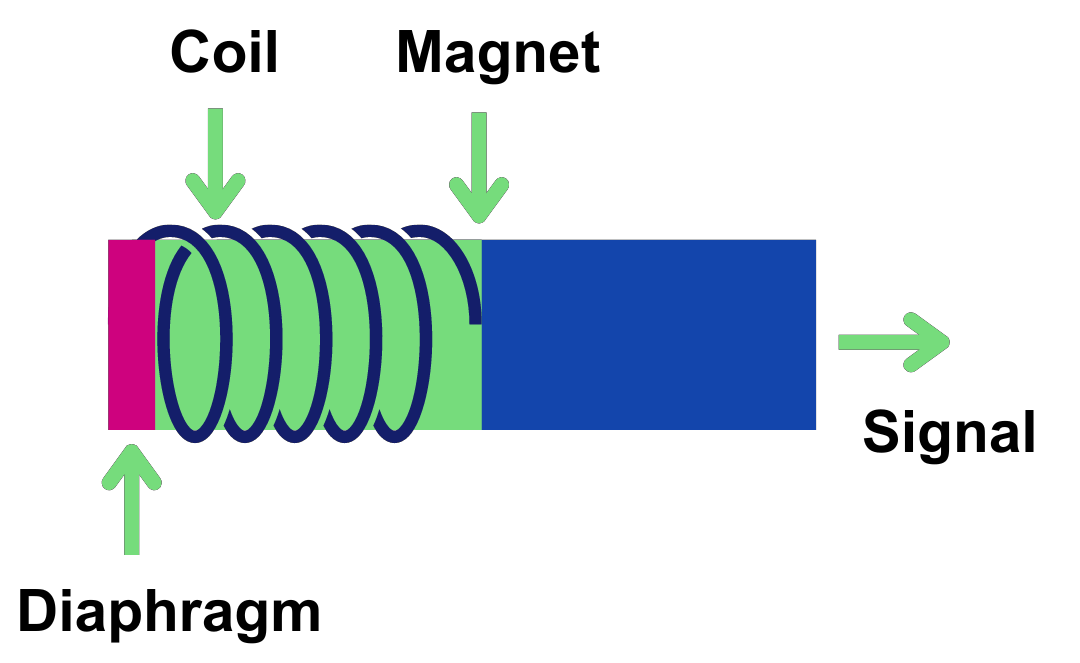
As a result, the oscillation generates an electrical current relative to the strength of the sound.
Dynamic microphones respond well to fluctuations in frequency and transient information, and they can handle high sound pressure levels (SPLS) well which makes them great for recording loud sound sources and performing live.
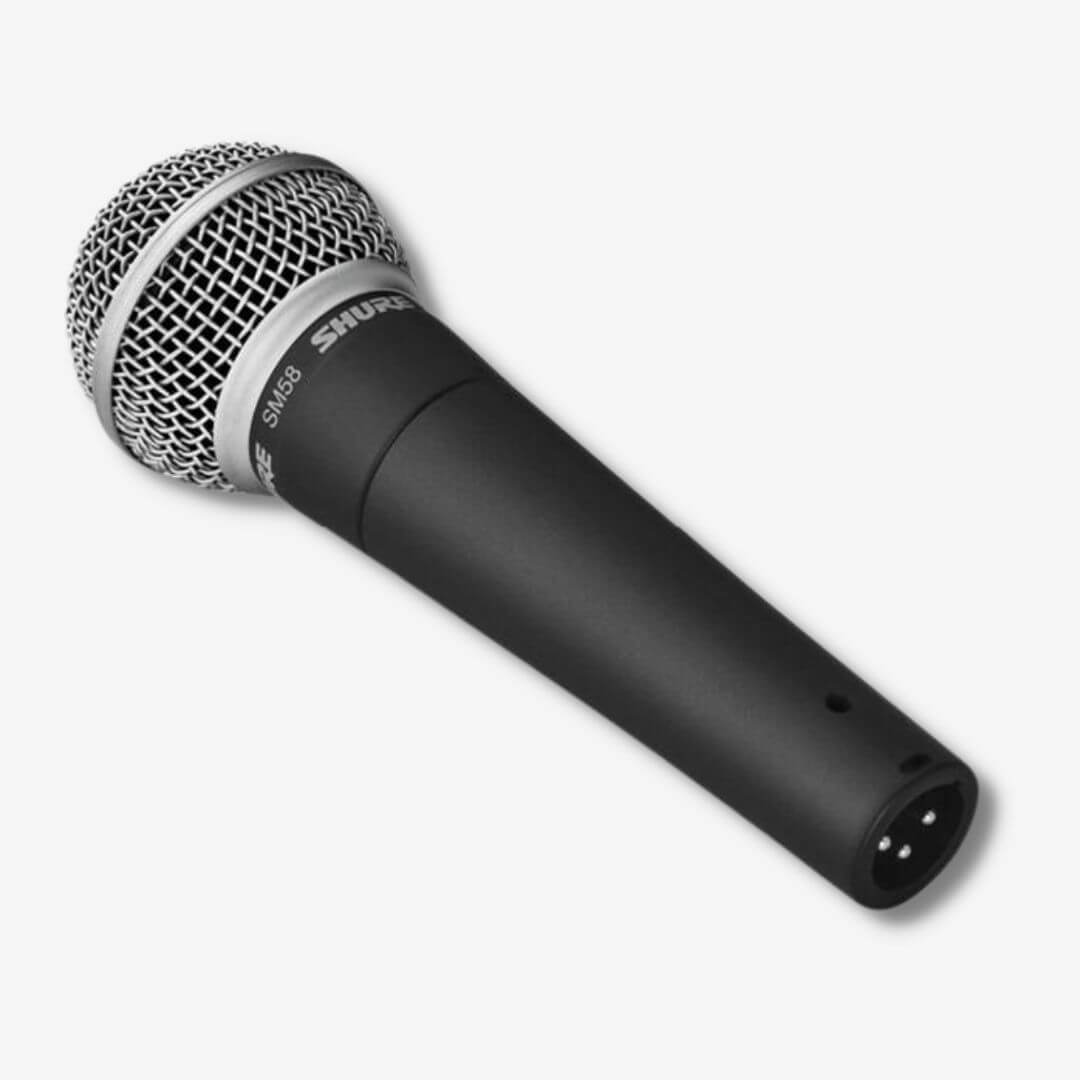
The Shure SM58 is the most popular dynamic microphone there is. In fact, vocalists use it on stage and even in the studio thanks to its tailored frequency response.
Condenser microphones
There are two types of condenser microphones: large diaphragm and small diaphragm. But small-diaphragm microphones are less suited to recording vocals compared to large-diagram mics so we’re not discussing those here.
Like dynamic microphones, incoming sound waves vibrate a diaphragm. But rather than being attached to a coil, the diaphragm is attached to a metal plate known as the backplate.
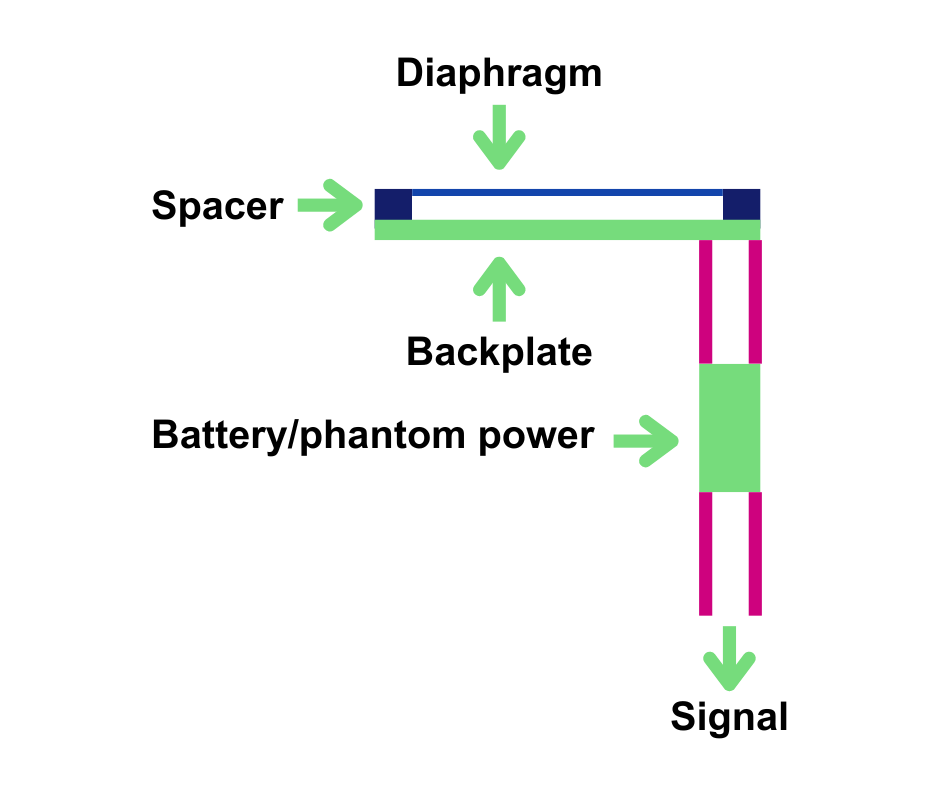
Then, the distance between the diaphragm and the backplate changes as the diaphragm vibrates. And this process creates an electrical current relative to the incoming sound wave.
However, the electrical current that a condenser microphone can generate is weaker than that of a dynamic mic. Therefore you’ll need to amplify it before you can do anything with it.
The design of condenser microphones and their dependence on external power makes them highly sensitive microphones. While dynamic microphones can handle loud sound sources, condenser microphones are good at handling quiet sources or those with intricate sonic details.
In fact. they can register the more intricate details of an acoustic instrument or the human voice that the majority of dynamic microphones can not.
Large-diaphragm condenser microphones
Large-diaphragm condenser microphones are the most common microphone for professional vocal recordings.
These microphones can capture a wide array of frequencies – from the bottom to the top end – and offer a fuller sound. That’s why they’re often the go-to choice for recording vocals.
Moreover, large diaphragm microphones have less self-noise which allows you to keep your recording clean too.
Phantom power
But, as we said, condenser microphones require external power. And it’s phantom power that supplies that boost in current.
Condenser microphones have a lot of electrical resistance (impedance) so they need a powered circuit to reduce that resistance. Phantom power reduces the resistance and gives condenser microphones the power to output a louder signal.
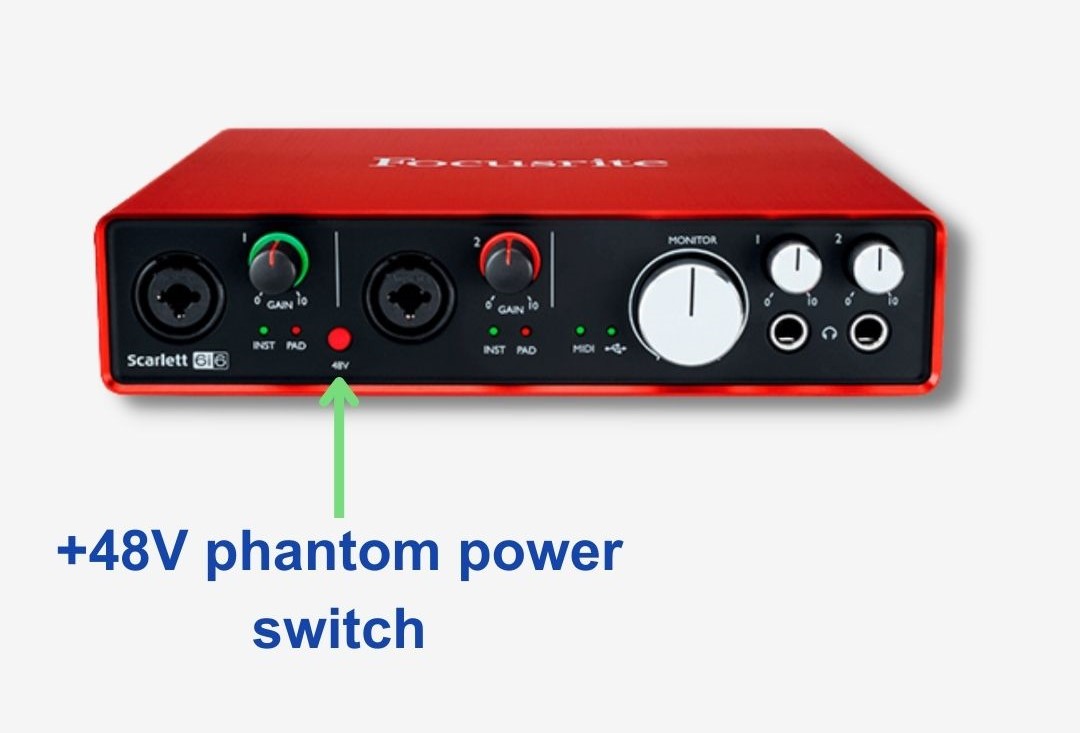
Thankfully, audio interfaces supply phantom power for condenser microphones, so you can record with condenser mics at home.
What else do you need to record professional vocals?
There are a handful of other tools you’ll need besides the right microphone.
1. Pop filters
A pop filter acts as a barrier between your mouth and the microphone diaphragm and filters out the pop sounds (plosives) that occur with letters like Bs and Ps.
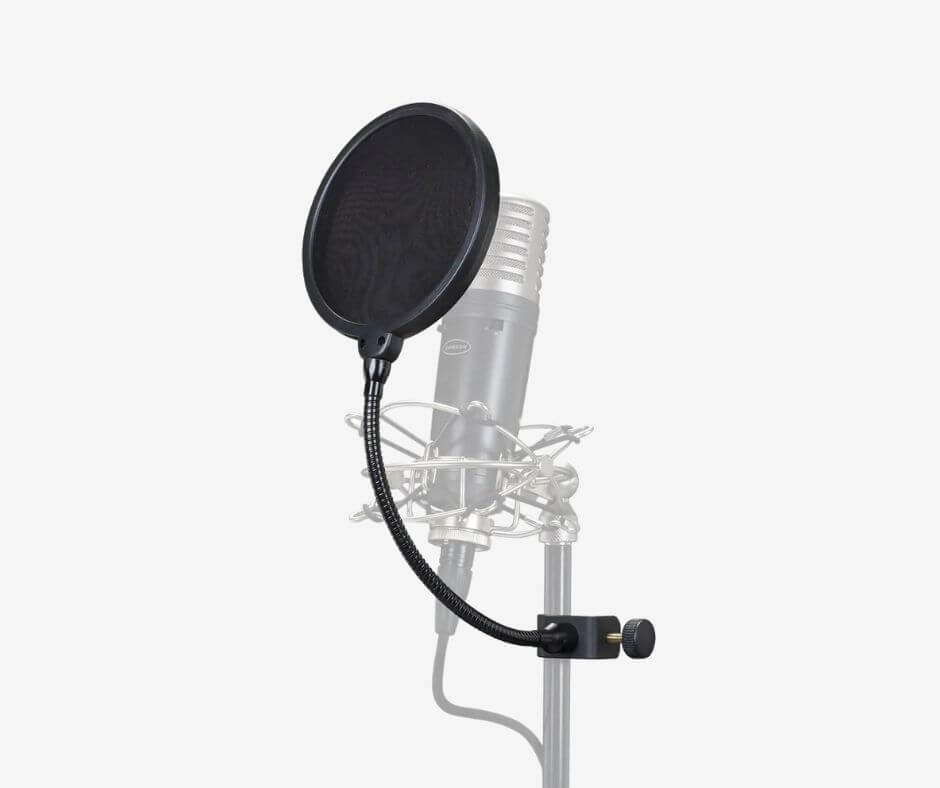
As a result, pop filters decrease the impact of plosive sounds that your microphone captures.
2. Microphone stands
Microphone stands are mounts for microphones, and there are six different types. They allow you to position your microphone freely, with the immediate benefit that you don’t have to hold your microphone.
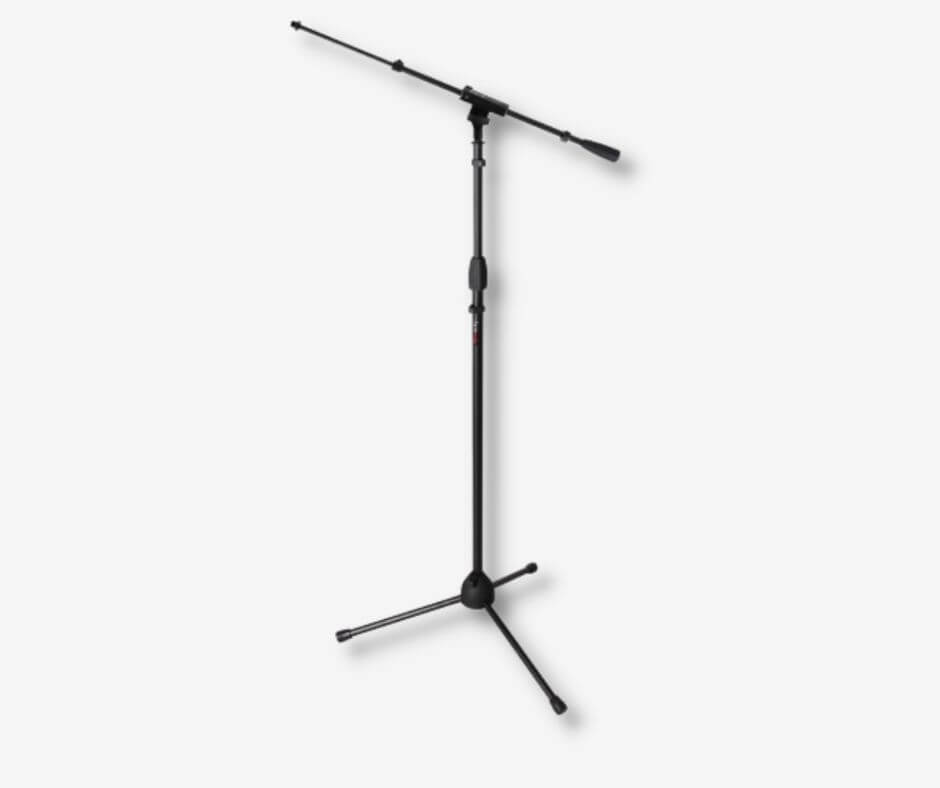
But microphone stands also remove the risk of sensitive microphones registering static interference that it would if you were holding the microphone.
The six types of microphone stand:
- Tripod stands are the most common microphone stand. They’re designed for general use, and they’re commonly used to capture guitar cabinets. You can identify them via their three tripod-style feet.
- Tripod boom stands have a longer reach than tripod stands but maintain the three tripod style feet.
- Round base stands have a round base rather than feet. This design takes up less floor space which makes them great for capturing vocals as they’re harder to trip over.
- Low profile stands are smaller in size. As a result, we can use them to capture kick drums and even guitar cabinets.
- Desktop stands look like low-profile stands due to their smaller size but can have tripod feet or a round base. They’re great for podcasting and bedroom recording!
- Overhead stands are the tallest – and most expensive – microphone stands. We’d use them when we need to reach big heights and awkward angles like drum overheads
3. Shock mounts
As condenser microphones are such sensitive mics, we need a microphone shock mount to avoid ruining recordings. Should anything contact a sensitive microphone, it sends low-frequency rumbles and artifacts through the mic and into the recording.
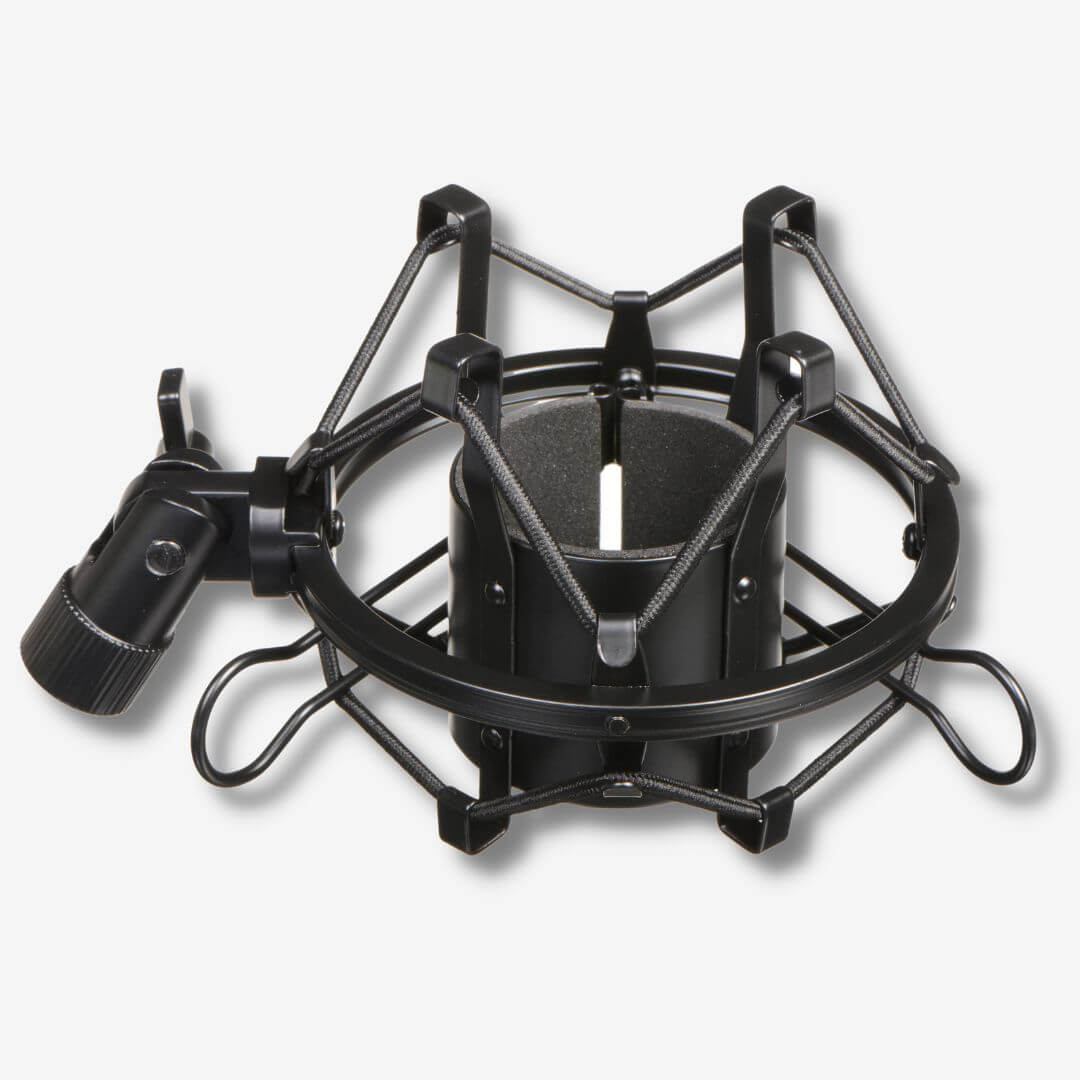
But a shock mount suspends the microphone so they prevent those artifacts from interfering with your recording.
4. XLR cables
XLR microphone cables allow you to connect your mic to an audio interface, a microphone preamp, or a mixing desk.
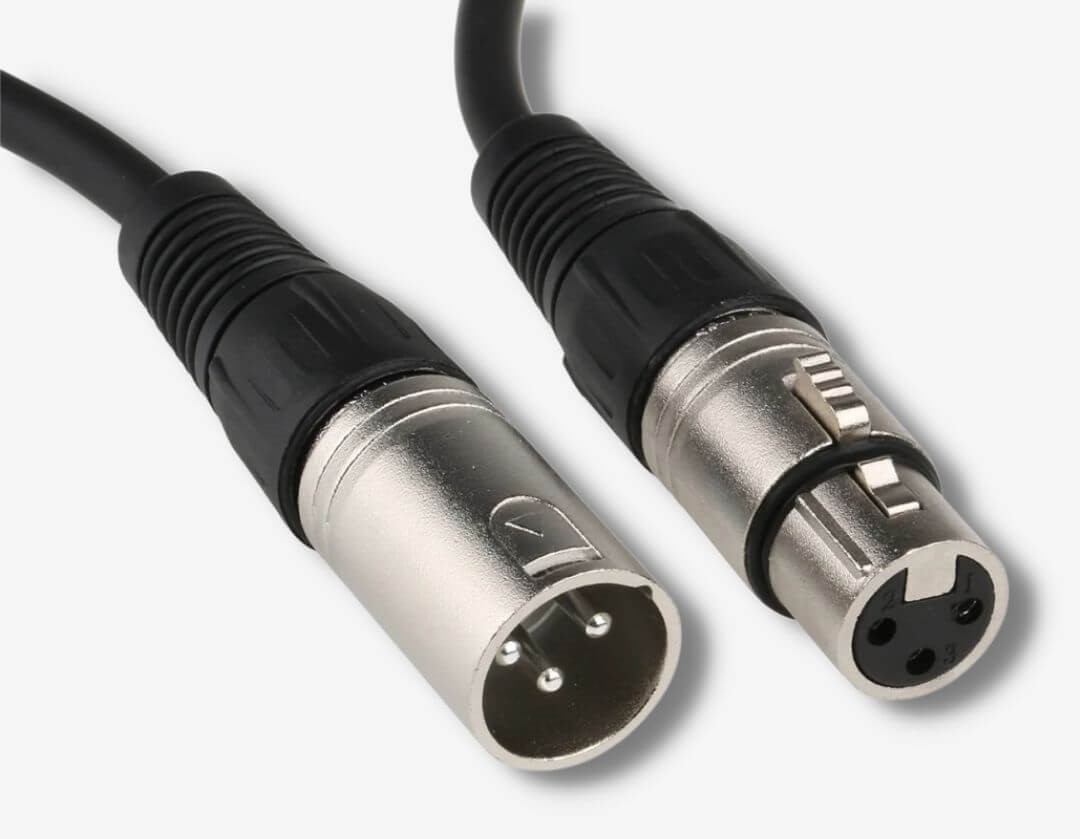
They have 3 pins inside the male connector and 3 holes in the female connector.
Two of those pins are attached to signal wires that carry identical copies of the mirophone signal while the third is a grounding pin.

Having two signal wires makes XLR cables balanced cables whihc means they eliminate unwanted noise that builds up in the signal as it travels through the signal.
5. Microphone preamps or audio interfaces
A mic preamp boosts the strength of microphone output signals. Because microphones are weak electrical signals, we need to boost that recorded signal to make it audible.
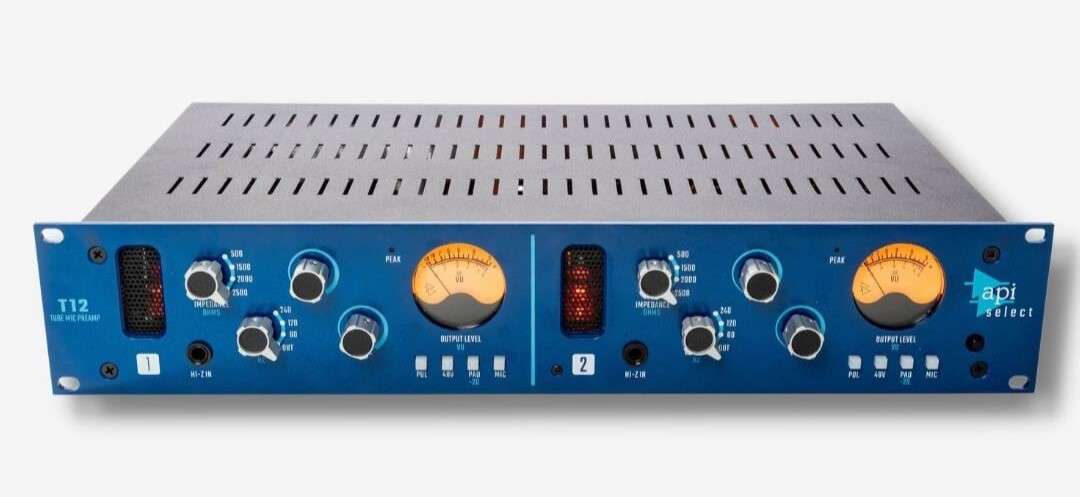
However, you won’t need to invest in a preamp for recording if you have an audio interface.
An audio interface is a digital recording device used in home and professional recording studios. Interfaces convert electrical microphone signals into digital signals that computers can read, and so they allow us to record music on computers and digital audio workstations.
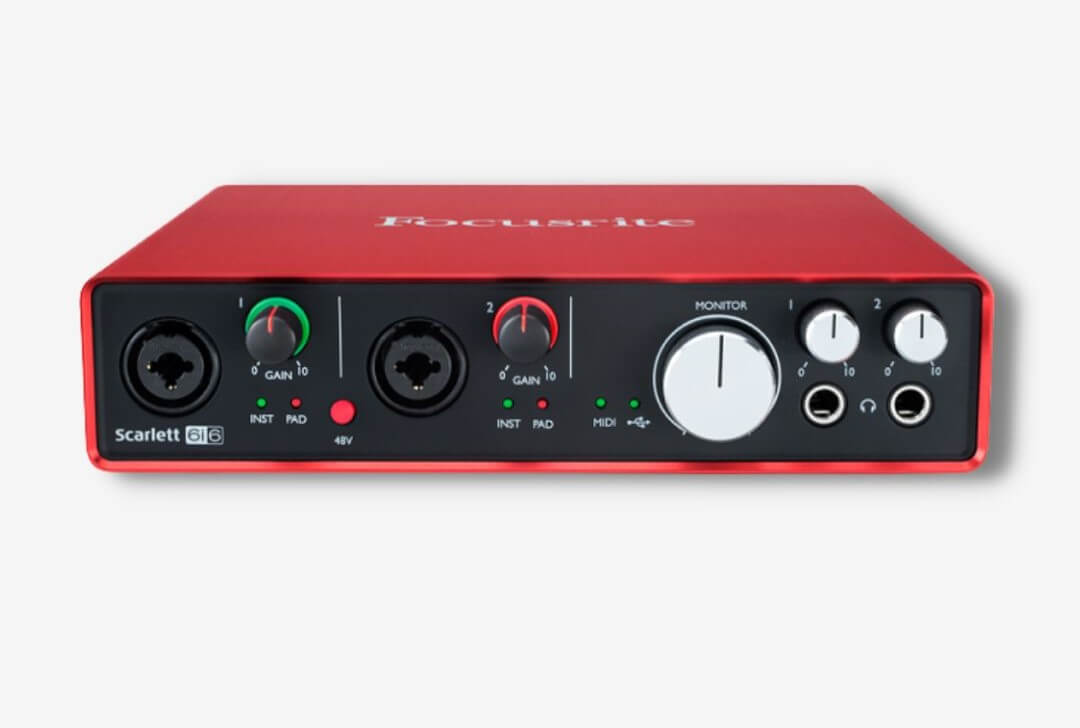
Audio interfaces utilize at least one preamp, so you can capture professional recordings with ease.
6. DAWs – software for recording vocals
A DAW – a Digital Audio Workstation – is software that allows us to record and make music on computers.

You can record and edit your vocal recordings inside a DAW, so they’re the software tool you’ll need to record your vocals on your computer.
7. Closed-back monitoring headphones
The design of closed-back headphones prevents sound from leaking into your outside environment and into your microphone.
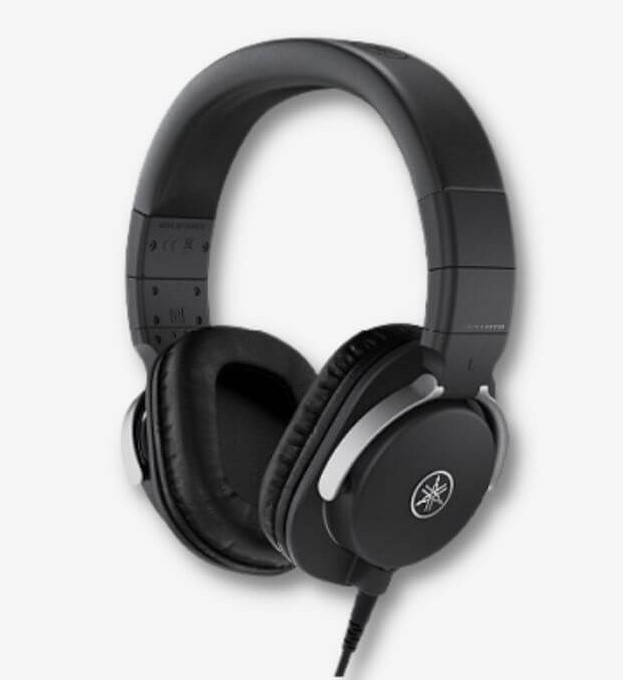
Therefore, they’re perfect for monitoring while recording as closed-back monitoring headphones don’t jeopardize your recording.
Microphone positioning and recording techniques
How you position your microphone is equally as important as the microphone you choose. It’s one of the biggest variables that determines the tone of your recording, but how you position your mic depends on the type of microphone you’re using.
Microphone pickup patterns
Microphone pickup patterns refer to the directions that a microphone can register sound. There is a handful of different mic pickup patterns, but the best pickup pattern for capturing vocals is the cardioid pattern.
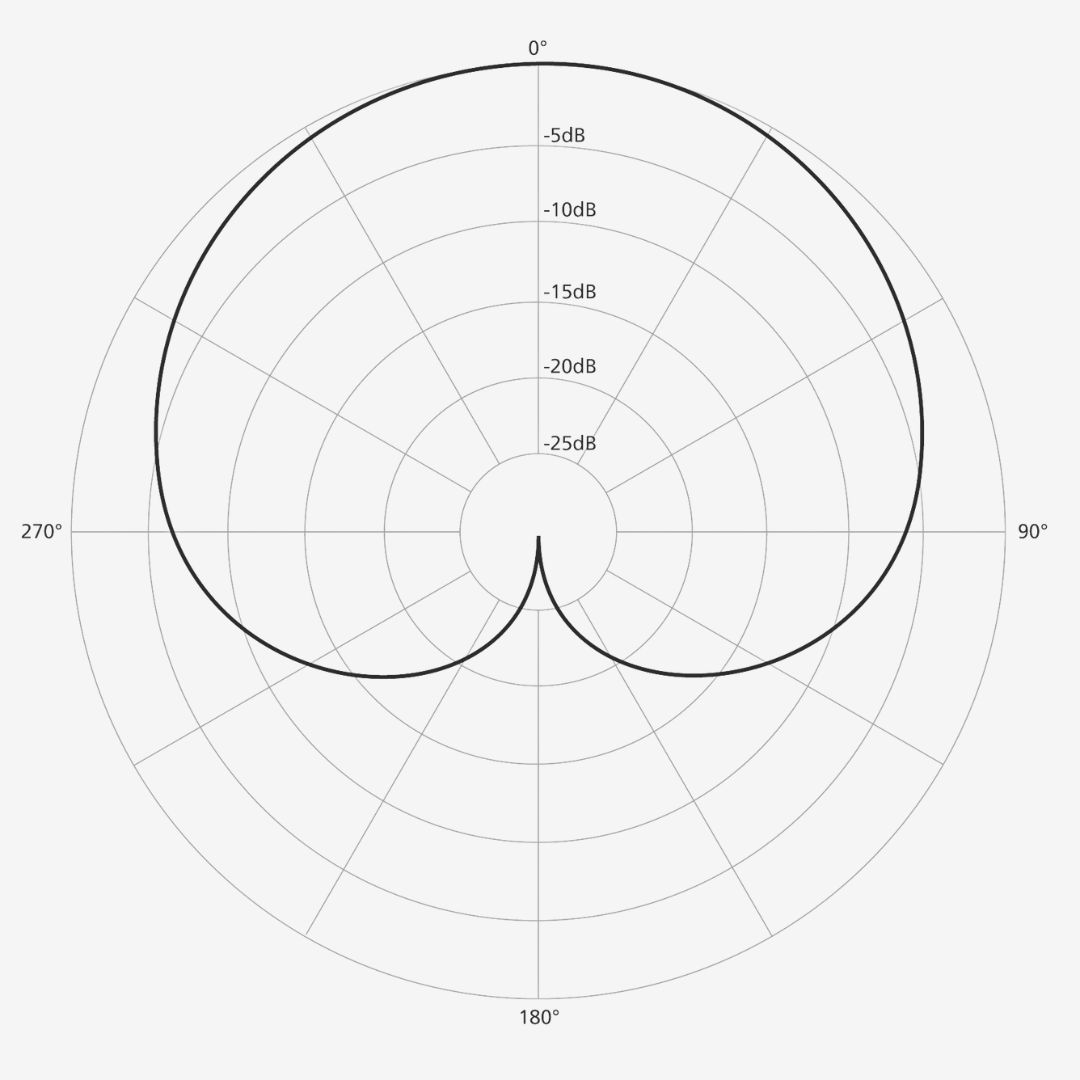
Cardioid microphones are super sensitive to sound directly in front of the microphone. Though a cardioid mic will register incoming sound from the sides, any signal captured here will be quieter than the signal from the front.
Furthermore, any sound from the rear of the mic head is rejected.
Though poor acoustic spaces are always undesirable, cardioid microphones can help minimize the risk of registering reflected sound and feedback too.
Adjusting the axis of the microphone
Before you record and between takes you can rotate your microphone a few degrees left or right to capture different tones or capture some room ambiance.
In fact, a microphone off-axis can significantly reduce plosives (Ps and Bs) and sibilance (S & Ts). And you can add more motion to your recording by physically moving while recording too.
For example, standing further from the mic in the verse but closer to it in the chorus adds more energy to the chorus. But remember that the mic will be more sensitive to fluctuations the closer you stand to your microphone.
Where to place your microphone in a room
It’s best to place your microphone just off the center of your room if you’re not recording in an isolated booth/pillow fort.

You’ll want to avoid placing your microphone in the middle of your room. It’s here that standing waves (a product of reflected sound) build-up, and so they’ll interfere with your recording.
Additionally, place your microphone as far away from walls and reflective surfaces as possible, and avoid placing it in the corner of the room.
How close should you be to your microphone?
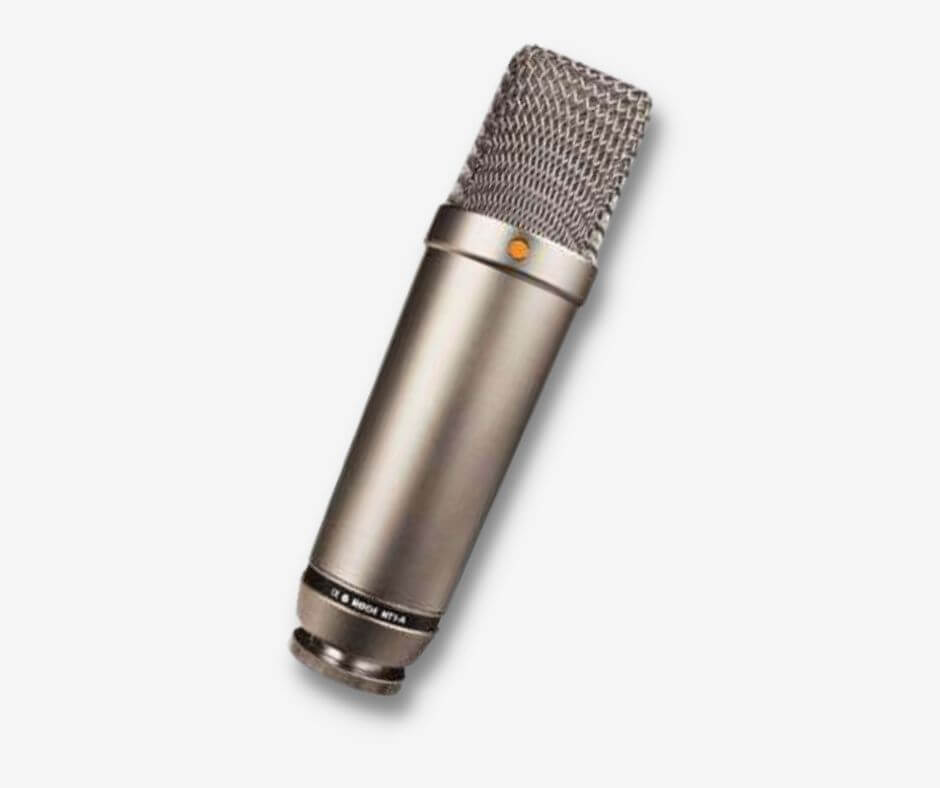
Keep at least 5 to 10 inches from the microphone if you’re using a cardioid condenser mic like the Rode NT1-A. But if you have a dynamic cardioid microphone you can get a little closer.
A good rule of thumb to measure the minimum distance to be from your mic is to spread yor thumb & pinky finger out in the “hang loose” hand sign. More specifically, have your thumb on your lips and your pinky on your mic and you should gte about 5-6 inches of distance.
Moreover, your microphone will register room ambiance the further you stand from your microphone. But the acoustics of your room will dictate how far you can stand away from your microphone. If it’s a poor space then you’ll get more undesirable reflected sound than desirable room ambiance.
But the closer you are will make the vocals themselves sound warmer. With that said, the closer you are to the microphone, the more apparent fluctuations will be if you move around a lot while recording with a cardioid microphone.
No matter what microphone you’re using, it’s a good idea to spend 20 or so minutes experimenting with different mic positions to see what sounds best for your current project. For the most natural recording, you’ll need to keep your mouth directly in line with the mic’s diaphragm.
The proximity effect
The proximity effect occurs when a sound source is too close to the microphone. Cardioid microphones are actually pretty vulnerable to the proximity effect because they’re hypersensitive to any signal in front of the mic.
Furthermore, the proximity effect amplifies low frequencies in the incoming signal, making bass tones more pronounced when the source is closer to the microphone.
But those with thin voices can use the proximity effect to their advantage. Someone with a thinner voice can make their vocals sound fuller by singing closer to the microphone
On the other hand, anyone with a deeper voice will need to stand further away from the microphone. The proximity effect makes deeper voices sound overwhelmingly thick and may distort the signal.
Experimenting with the height of your microphone
Be wary of the height of your microphone. Higher frequencies are directional, meaning they travel one direction at a time compared to low frequencies which are omnidirectional.
So a microphone positioned under your lip will sound brighter than one above your lip because high frequencies emit from our mouths in a downward cone. But a lower microphone will be nearer to your chest and increase the bass response.
And having your microphone above your lip will reduce the highs and lows and give you a more pronounced mid-range. And raising the mic again by a few inches to eye level (pointing downwards) will boost the lower mids, attenuating the bass, and reducing highs.
You could experiment with all of these positions and blend them and achieve a really pronounced sound too. Experiment with the height of your microphone and see what sounds best.
Though having the mic at lip level is the most common height, is it right for your music?
How many vocal takes should you do?
Record at least 3-6 vocal takes. You’re more likely to capture all of your singing abilities the more vocal takes you capture.
Furthermore, the more takes you record allows you to experiment with microphone placements as we discussed above. In fact, many professional tracks contain selections of multiple takes.
Sometimes, you can get what would be the best take but it features a couple of mistakes. Well, with multiple takes you can “punch in” a section from another take, and the problem is solved!
Besides fixing mistakes, you can record multiple takes and layer them on top of one another for a thicker sound. Or you can send one take to the left and one to the right for a wider sound, or do both.
Each vocal take being different adds to the tone of the vocals overall too!
Setting levels for recording
The final step before you can start recording is gan staging. Setting the right input levels in your DAW is important as to avoid clipping/distorting your recording, and ultimately get a smoother recording.
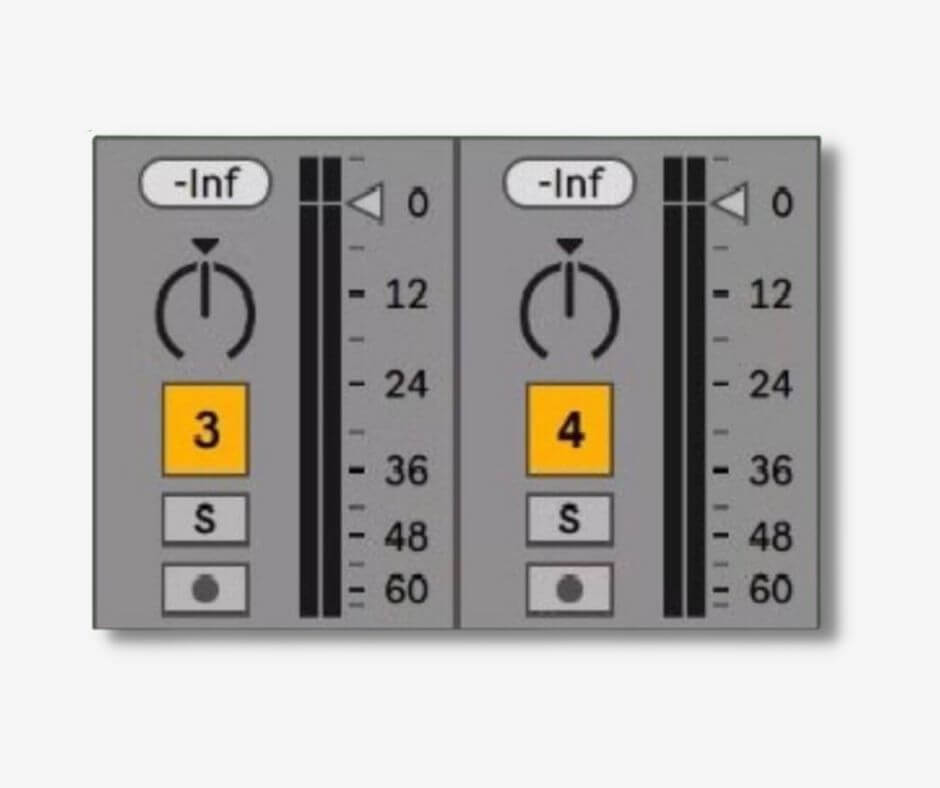
The guidelines below are great starting points to avoid swallowing too much headroom.
- Averaging around -18dBFS
- Peaking around -10dBFS
- Never peaking higher than -6dBFS
Make sure you sing as loud as you can as you set your levels!
How to mix vocals professionally
With all of your takes down it’s time to make your vocals fit with the rest of your music. But bear in mind that how you mix your vocals depends on:
- The tone of your vocals
- How well you have delivered them
- The quality of the recording
It’s good practice to listen to the vocals with every other instrument playing so you can gauge what you need to do in the mixing process.
Where should vocals sit in a mix?
Vocals need to be front and center – literally. By recording in stereo, you have a left, right, and center channel that you can pan the elements of your track to. Taking advantage of the space between each of those channels creates a stereo image.
The main elements of your vocals should be the loudest elements sitting in the center of your stereo image. They need to be clear for your listener to hear and having them front and center in this way allows them to be so.
Tips for mixing vocals
There are a handful of effects that you’ll use when mixing vocals. But the best thing to remember is that less is more.
1. High pass filtering
The first thing to look at is filtering unnecessary frequencies in your vocal recording. Listening to your recording is the best to figure out how much filtering is necessary.
Firstly, cut out any frequencies below 180 Hz with a high pass filter. Then raise the threshold until you start to lose the body of the vocals. Where this is happening is where your filter threshold should sit.
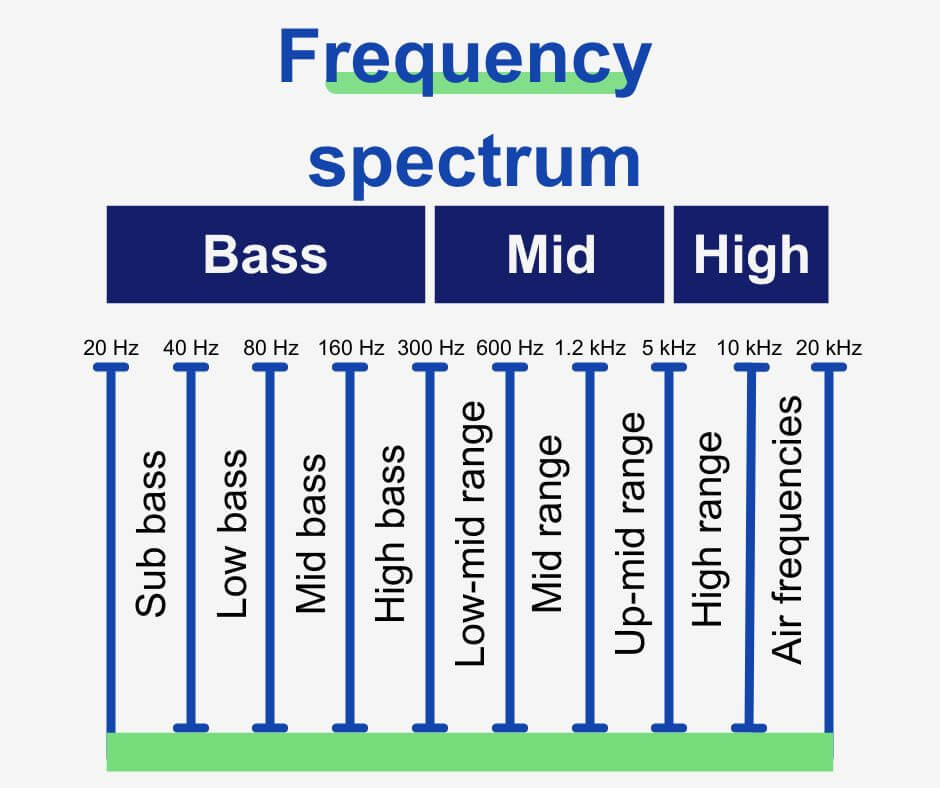
In any case, it’s best to take a little too much away and dial the filter back. You can adjust the filter at any time anyway!
This process of removing low frequencies cleans up the recording by eliminating low-end muddiness.
2. De-essing and compressing
Next, it’s time to look at de-essing.
De-essing removes harsh sibilance from your recording. We produce sibilance when we say words with the letters S and T in them, and they’re pretty harsh to listen to in a microphone recording.
There are a number of free de-esser plugins out there too such as T-De-Esser by Techivation and Spitfish by digitalfishphones.
And now you can begin to even out the levels with compression. But rather than using one compressor with big settings, I recommend using two compressors with small settings on each (serial compression).
Insert the first compressor and use it to even things out. Aim to make the peak levels as even as possible without removing too many dynamics. You can see these suggestions as a guideline:
- A ratio of 2:1 or 4:1
- Attack time of around 50ms
- Release time of 40ms
- Experiment with the threshold until you are getting at least 2-3dB of gain reduction.
As for the second compressor, use this one to manipulate the tone of your recording and make your vocals sound more solid.
Here, use more aggressive settings:
- A ratio of at least 4:1
- Attack time of 15ms or lower
- Release time of 10ms or lower
- Experiment with the threshold
3. EQ
Now you can begin EQ’ing your vocals.
While referencing how your vocals sound in amongst the rest of your track you can decide what frequency bands need adjusting.
As a rule of thumb, boosting the frequencies in and around the 5kHz range gives your recording more presence.
But attenuating some high mid frequencies below the 5kHz threshold could clean up any harsh frequencies if there are any.
An easy way of discovering harsh frequencies is to apply brief gain boosts to frequency bands. By doing so you can determine what sticks out and what sounds unpleasant.
Make sure to use the makeup gain or equivalent control to bring the level of your recording back up or down to where it was when you’re done EQ’ing.
4. Reverb and delay
The final stage of mixing is applying reverb and delay to add some more depth to your recordings.
This stage glues everything together, so don’t be afraid to experiment. Try using lower delay times and then longer ones, and you can experiment with the stereo width of your track here too.
For example, you can split the channel into two channels and pan one left and one right. Then insert a delay plugin onto one and apply a delay time of 10 – 15ms and see how much wider your recording seems!
How you use delay and reverb is very dependent on your track. But while applying effects like reverb to vocals remember that less is more because a little goes a long way!
Final thoughts: more tips for recording vocals
And now you know everything you need to get started recoridng recording professional vocals at home!
Once you have the neccesary equipment, you’ve warmed your vocals up and are recoding in the right place with the techniques taht work for you, you’re set!
But there is always a lot more to learn. And that’s why we thought l;eaving you with these bonus tips may help you further on your journey!
- Control your breathing when you’re recording
Naturally, you’lll need to breath while recording – but breath sounds can interfere with the quality of your recording!
You will be able to cut some in the mixing stage but reducing excessive breathing will make editing your recordng that little bit easier. To do so, simply turn your head to either side away from the microphone for each breath.
With that said, some breathing can add value to your vocal recording. A limited amount of breath sounds give the recording a natural feel, so learning where breath sounds sit best – usually at the start of a phrase – will level up your recording sklls. - Utilize vocal comping for a smooth workflow
It’s difficult to get everything right in one take as we discussed earlier. And that’s why so many artists utilize composite takes – recording a whole track one section at a time, known as vocal comping.
Recording multiple takes of each section gives you so many recoridngs to work with that you’re bound to create the best recording and capture perfect the vocal recording! Simply choose the best takes of each section and create a full track with them. - Add audio effects at the right time
Though there’s no ‘rule’, it is generally better to record dry vocals (with no processing) if you’re not an experienced vocalist.
Aside from the effects we have already mentioned there are loads of creative effects out there. And it can be tempting to insert as many possible before recording, but’s not always a great idea.
Once you record it you cannot remove any processing, so it’s a good idea to leave the audio effects until you’re happy with all of your vocal takes. As a resut, it’s easier to hear any errors in your recording that may need editing or cutting.
Okay, that’s enough reading – how is your recording coming on?