What does a DI box do? Why use one?
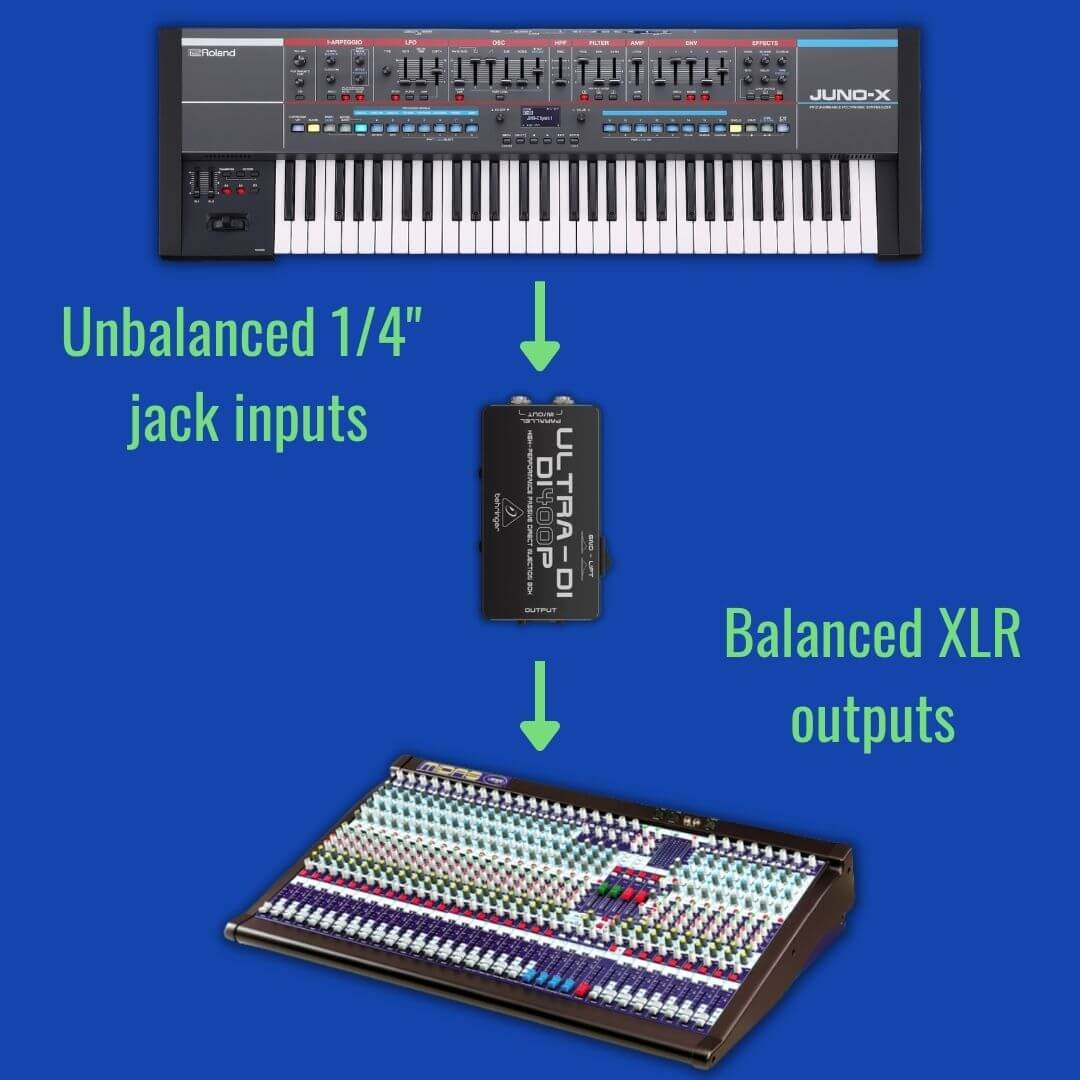
A direct injection (DI) box converts unbalanced instrument level signals with high impedance (electrical resistance) into balanced microphone-level signals with low impedance.
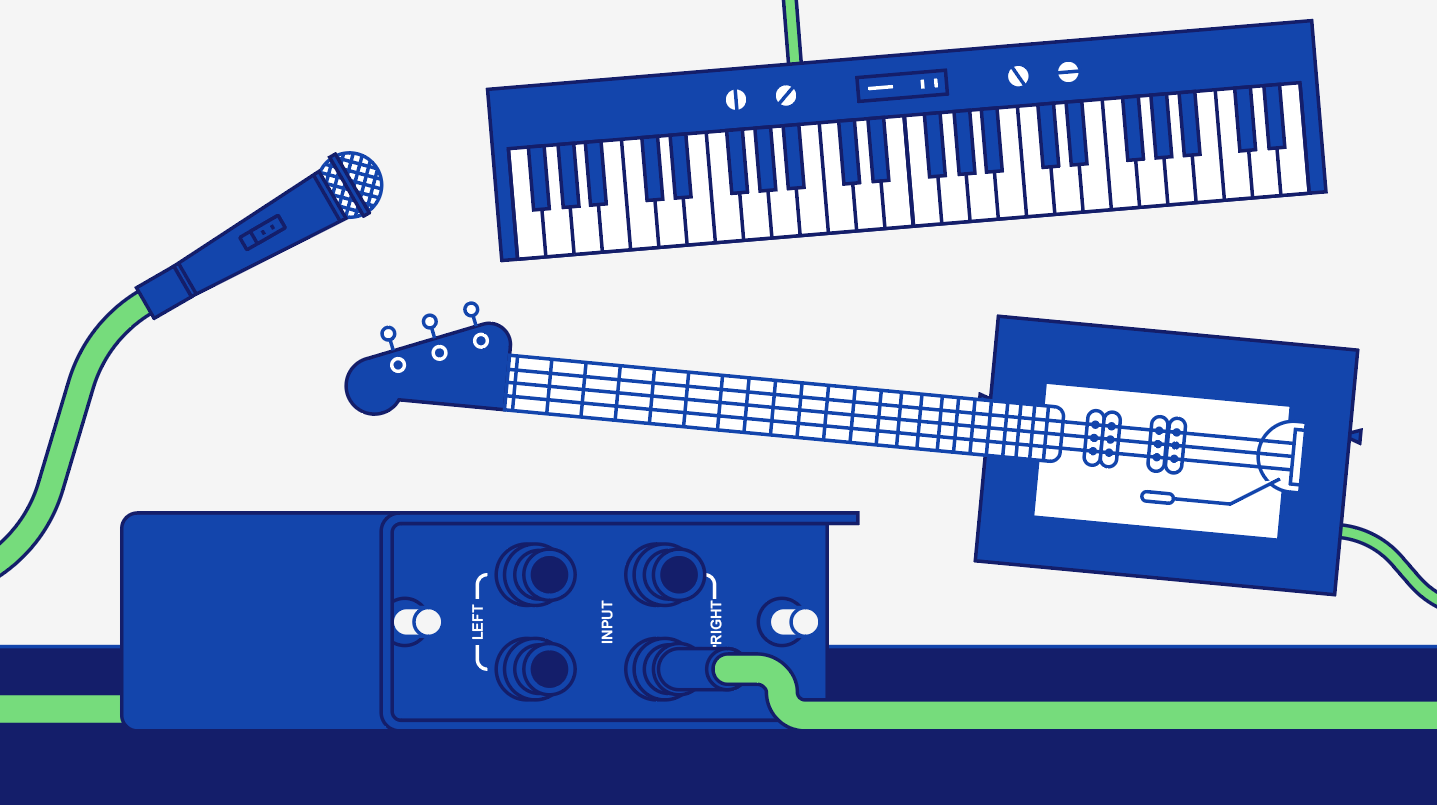
The pick-ups on instruments such as electric guitars and bass produce a signal with high impedance, but we need to decrease the resistance via a DI box so we can run these signals through a mixing desk.
- What does a DI Box do?
- Do I need a DI Box for home recording?
- How does a DI Box work?
- What’s the difference between active and passive DI boxes?
- Common features you’ll find on a DI Box
You’ll usually find DI boxes on stage during a performance, though you can use them in your home recording studio. However, the reason you’ll see them on stages more than in studios is due to how unbalanced signals pick up noise over longer distances.
The point of a direct injection box is to convert an unbalanced signal to a balanced one while it travels through a long cable. So converting that unbalanced signal into a balanced one via a DI box eliminates the noise problem. As a result, DI boxes come in handy in larger venues on big stages with big PA systems. In fact, one DI box allows the signal to travel a distance of 100 meters (300 feet) without picking up noise! And a live mixing console is usually positioned 50 to 100 meters away from the performers. So a DI Box is a critical tool that sits between them that keeps the signal from bass and electric guitars and keyboards/synths clean as it travels to the mixing desk.
Despite our referring to Direct Injection, DI can also refer to other names like Direct Insertion, Direct Input, or Direct Interface.
What does a DI Box do?
Okay, so we’ve discussed how a DI box can eliminate any noise that your unbalanced signal may pick up while travelling over a long distance. By converting an unbalanced signal into a balanced one, you can stop that build-up of noise from reaching your speakers and ruining the live show.
But this conversion also affects the impedance of that same signal. Signals with low electrical resistance are better at rejecting noise, but low resistance signals also work better with receiving equipment like mixing desks and speakers compared to high impedance signals. If your signal has a lot of electrical resistance, receiving equipment needs to work harder to get the signal to an optimal volume level. And this isn’t very good in a live sound scenario!
We mentioned in the intro how the output of a DI box is a mic level signal. This means the balanced output of a DI box is treated like a microphone signal – the weakest signal strength. Therefore the conversion from a high impedance (unbalanced) instrument signal to a low impedance (balanced) microphone signal means there isn’t a disparity between the impedance of the signal and its signal strength either. Because instrument-level signals have more strength than mic level signals, attenuating the impedance but not decreasing signal strength may lead to overdriving the receiving device, giving you heavy distortion.
Do I need a DI Box for home recording?
We briefly touched on how you could use a DI box in your home recording studio. Although this is true, you don’t need one unless your connecting instrument-level or microphone-level outputs to line-level inputs with mismatching impedance values.
Line-level is the strongest signal strength. Instrument-level is in the middle while microphone-level is of the lowest strength. And as we have just discussed, these different signal strengths have differing rates of electrical resistance. There is also speaker level which is the strongest of them all, but we can leave the technicals out.
Anyway, it’s microphone preamps that boost microphone-level signals to line level strength in a studio. And your audio interface will have at least one microphone preamp built-in. This means you do not need a DI box to record with a microphone in your home studio as your audio interface does the same job.
As for instrument-level signals, audio interfaces have dedicated instrument inputs in the form of 1/4″ inputs that have a high impedance to match. Hypothetically, if you were to connect a high impedance instrument signal to a low impedance input you’ll chop off some high-frequency content which isn’t very desirable. But thanks to the manufacturers of audio interfaces, this won’t happen!
So no, you do not need a DI box for home recording if you have an audio interface.
Both capture an instrument signal and convert it to a digital signal. However, an audio interface transfers a signal to a computer for audio manipulation. Whereas, A DI box takes a signal to a mixing desk for studio recording or live use. A DI box also converts a signal to a low impedance source.
Tone Topics
But in a professional studio…
In contrast, you may find DI boxes in high-end recording studios. This is because instrumentalists record in an isolation booth which allows the microphone to capture the direct sound from the instrument with no background noise.
The use of a DI box in this scenario is to once again stop the build-up of noise over long cable lengths. However, some mixers may not have the right inputs for your instrument. This is more of a problem with older mixing desks, but many mixer inputs have a ‘one size fits all’ instrument input that may not support your instrument. So a DI box converts that instrument signal into a microphone one that the mixing desk will accept.
How does a DI Box work?
There are two types of DI Box: active DIs and passive DIs. Much like how dynamic microphones (passive transducers) and condenser microphones (active transducers) both serve different types of recording applications, there are different configurations of direct boxes for different applications too.
Like dynamic microphones, a passive direct box can handle high sound pressure levels without adding distortion. On the other hand, active DI boxes produce a wider frequency response and are more sensitive to intricate details like condenser microphones.
What does a passive di box do?
Passive DI boxes are the most common DI boxes you’ll find. Passive DI boxes work best for headphones or loudspeaker outputs. But a common problem you’ll encounter with passive DI boxes is hum. Typically, cheaper DI boxes have a more noticeable hum. Additionally, passive DI boxes aren’t as versatile as active DI Boxes.
However, passive DI boxes do not need an external power source to work. They’re also easy to use and durable, and the high-end passive boxes are very reliable.
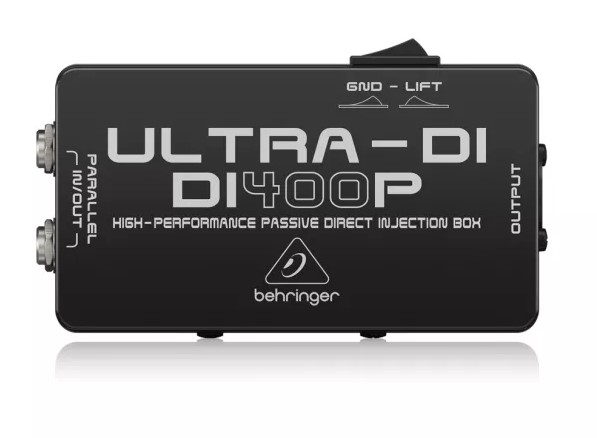
The Behringer Ultra-DI DI400P is an affordable example of a passive DI box. It’s not got so many features as other DI’s, but it does capture a harmonically rich sound – making it a great choice to record/perform with electric guitars, bass, keyboards, and synths. It also features a ground lift switch to cancel out ground loops.
Instruments with no power source are better suited to active DI boxes. These include acoustic instruments and older keyboards.
If the sound source is active – like a synth or electric guitar – use a passive DI box.
What does an active DI box do?
Active DI boxes have an onboard preamp and are more versatile than Passive DI boxes. But unlike passive boxes, active units require an external power source.
Active DI boxes can have a battery or a standard AC outlet connection. Some active units also have an option for phantom power.

The Rupert Neve Designs RNDI is an active DI box perfect for capturing acoustic instruments such as pianos. It features a “speaker mode” that can handle up to 1000 watts of solid-state power, meaning you can DI the sound of your guitar and bass amps.
If the sound source is passive – like a guitar – use an active DI box.
What’s the difference between active and passive DI boxes?
There are a few key differences between active and passive DI boxes. Firstly, the most obvious difference is that passive DI boxes do not need an external power source whereas active DI boxes do.
But you can power active DI boxes with batteries or an AC input. As a result, active DI boxes provide phantom power. More specific differences include the fact that passive DI boxes only act as transformers. Passive DI boxes feature transformers that perform impedance matching (via attenuating the resistance of your input signal).
In a less than ideal scenario, if your sound source has a particularly low level then a passive DI box won’t really be able to do much to increase the level of your signal. As the level of impedance always depends on the sound source, a passive DI box has a narrower set of applications compared with active boxes.
Despite this, passive DI boxes do have some serious advantages. For example, thanks to active circuitry high end passive boxes don’t give off any unwanted noise. And some passive DI boxes even add nice colour to the signal too! Colouration may not always be desirable though.
A huge difference between the two is that active DI boxes include a microphone preamp. Thanks to the external power, active boxes can beef up your signal and make it stronger while also allowing for higher input impedance too. Unlike passive boxes, active boxes can work well with lower-level signals.
If you find you need a DI box for studio recording, it’s an active di box that’ll suit your needs. In fact, active di boxes specifically for studio use include tube DI boxes and solid-state boxes.
Common features you’ll find on a DI Box
Multiple channels
You can find both single input and multiple input DI boxes. Additionally, there are rack-mountable DI boxes with up to eight channels. Though this sounds like a handy studio tool, you’ll find these in live performances more commonly than in studios.
Throughput (Thru/Bypass)
A throughput option splits your input instrument signal into two outputs. You can send the second output to an amplifier or to a monitor so you can hear your performance before applying external processing.
Ground lift
Balanced equipment can fall victim to the noisy hum and buzz that ground loops cause. So a ground lift option disconnects pin 1 of the DI boxes’ XLR input. This stops the current that flows between your DI box and microphone preamp and removes the noise.
Pad
Pads, which you’ll also find on some microphones, are gain attenuators that stop excessive gain from overloading the circuitry in the DI box. Pads often attenuate your signal by a fixed amount – such as 10 dB, 15 dB or 20 dB – and allow you to plug in equipment with high output levels and/or unbalanced line equipment.
Polarity reverse
Finally, we have Polarity reverse which flips the polarity of a signal and prevents feedback. If your mixer doesn’t have any polarity reverse options, one on a DI box is very handy.
Other applications of polarity reverse allow us to adjust the XLR cable configuration from a standard Pin 2 hot to Pin 3 hot. If you’re using an XLR cable that’s been wired incorrectly, polarity reverse will solve that problem while you use it.
And polarity reverse allows us to align the absolute polarity of a direct signal with the polarity of a microphone on the same input source. and keep the signal chain balanced
Final thoughts
A DI box is a critical tool in some scenarios. You can use them practically in live sound and studio applications. However, there is scope to use them creatively.
In fact, industry standards for DI boxes have grown. You may find that running an acoustic guitar through an active DI box may give your signal some desirable openness. But on the other hand, using a passive DI box with powered devices such as a keyboard or digital drums is better because a passive DI box can handle higher levels without distorting.
So, is a DI box right for you?