How to Sidechain in FL Studio: Elevate your mixes
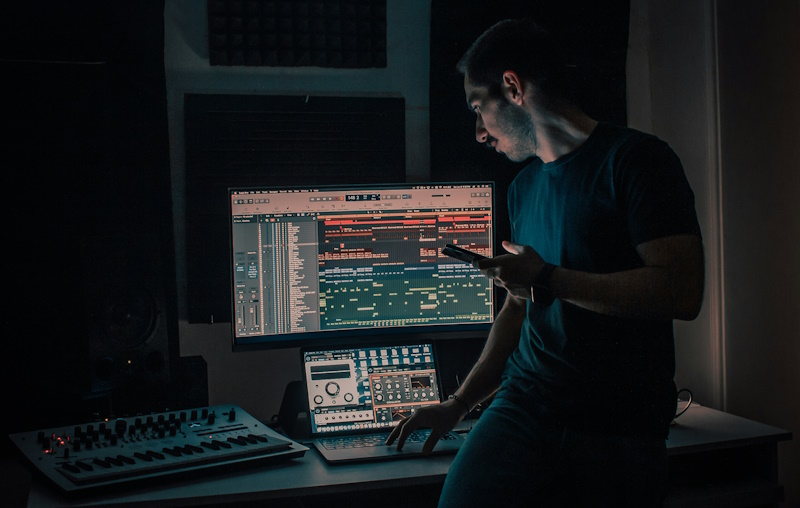
Image credit: Rezli
Unlock dynamic mixing power! Learn how to sidechain in FL Studio with two techniques. Step-by-step guide with beginner friendly tips.
Sidechaining is a hidden gem in the arsenal of audio production tools. Its a subtle mixing technique that, once you begin to use it, packs your mixes with dynamic punch that makes it stand out and hit harder.
This compression technique will help your bass and kick drums stand out in the mix, making for a powerful rhythmic effect. But it can also do so much more, whether you’re an EDM maestro or a straightforward guitar and vocals kinda person.
What is sidechaining?
Sidechaining is a technique that allows you to quieten one part of your mix based on the sound of another part of your mix, letting it punch through the noise more so.
Here’s an analogy: Imagine you’re in a bustling city centre. You’re surrounded by the noise of the cars, buses, shopfronts, and other people. Your friend is trying to talk to you. Now imagine that every time they said something the sounds around you quietened down, putting emphasis on your friend’s words. That’s what sidechaining is like!
A common use of sidechaining is to drop a bass or low-end synth when a kick drum hits. This adds a certain oomph to your mix and bolsters the rhythm that your kick drum is driving.
What do some of the terms in sidechaining mean?
- Trigger Track: This is the track you want to emphasise as it triggers the effect. Its volume will control the effect on your other track(s). Generally, this is a kick drum.
- Sidechain input: This is the track you are then “ducking”, meaning lowering the volume of to give more space to the trigger track. This is often a bassline or synth.
- Compressor: This is the tool that enables you to achieve this mixing technique. It pulls the volume of a track down, allowing you to adjust how the effect works.
We’re going to show you a few ways that you can achieve the effect in FL Studio below. You can check out our article below for more in-depth knowledge about how this process works with examples of hit songs that use this technique for a massive sound.
Sidechaining in FL Studio: A step-by-step guide
You can sidechain with a number of different compressors. Getting to know different compressor plugins and finding one that you like to use will be great for your production. However, FL Studio comes equipped with a few built-in. We’ll be using FL Studio’s Fruity Limiter as it’s a super simple tool that comes included in all editions of Fruity Loops.
If you’re completely new to using compression then don’t worry, our guide doesn’t require you to know what all the knobs mean. You can follow our guide and hear the effect enough to get started. For more guidance on exactly what it all means, you can check out our in-depth guide on how compressors work and how to use them.
In these examples we’ll be using sidechaining to duck a bass synth when the kick drum hits. This is the most common use for sidechaining, however we explore other ways in which you can use the same technique later on.
Sidechaining with FL Studio’s Fruity Limiter
Fruity Limiter offers the easiest way to get an authentic sidechaining effect within FL Studio. It provides the traditional sidechaining technique that compresses a track based on the volume of another track.
- Open Fruity Limiter in the track that you want to duck (in this case the bass synth).
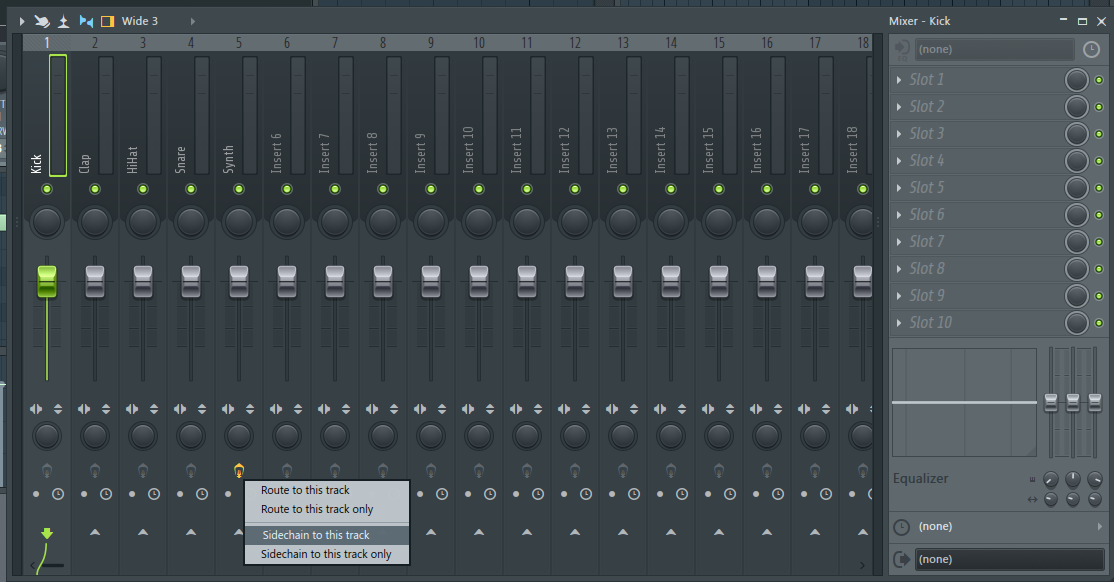
2. Select the other track (in this case the kick), then right click the small, upwards arrow on the track you want to duck – from the pop-up menu, select ‘Sidechain to this track’.
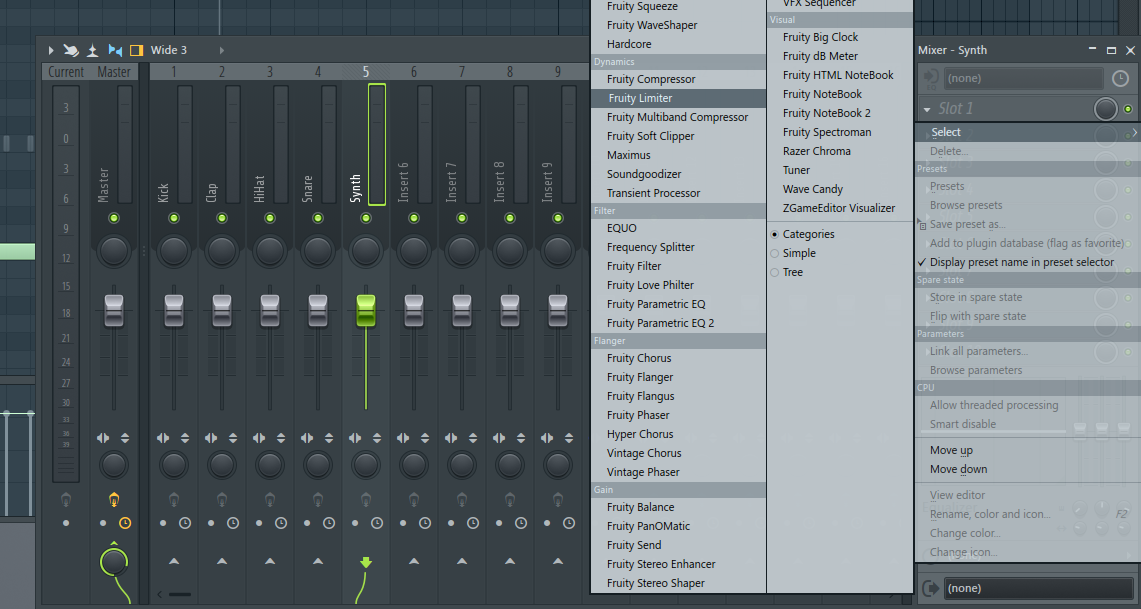
3. Open your Fruity Limiter and change from the Limit page to Compressor, then change the number in the SIDECHAIN section to ‘1’
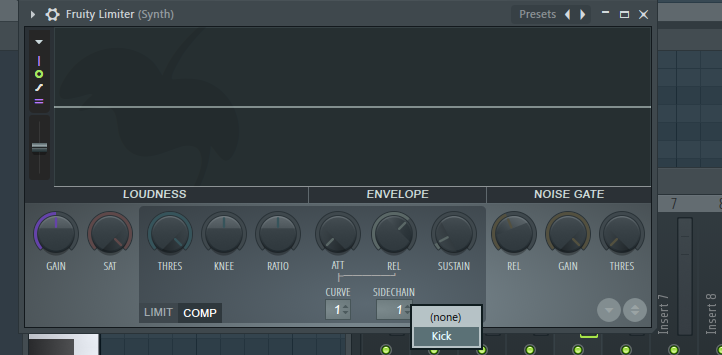
4. Drop the threshold and raise the ratio – keep tweaking until you get the desired effect
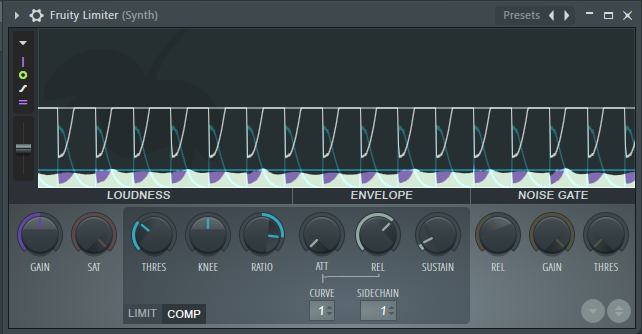
A good way to hear the effect is dropping your threshold all the way down, then increasing the ratio all the way up. From here the effect is maximised, so you can bring it down making it more and more subtle until you think it sounds good.
Bonus: How to cheat at sidechaining in FL Studio
There’s a very simple way to get a sidechain effect without having to go through the manual process of linking your tracks and linking your compressor. Technically, this technique isn’t sidechaining as the compression is happening based on beats rather than another track’s volume. This method is great for a really quick effect that ducks a track on each beat for the same effect as using a compressor.
Here’s how to cheat at sidechaining:
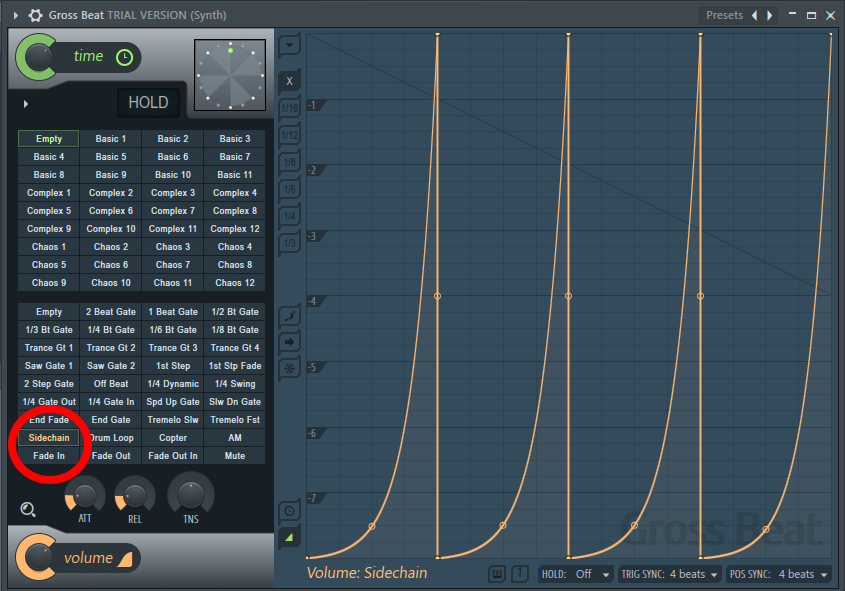
1. Open Gross Beat in the channel you want to duck

2. Select ‘Sidechain’ from the bottom grid of options, near the bottom left
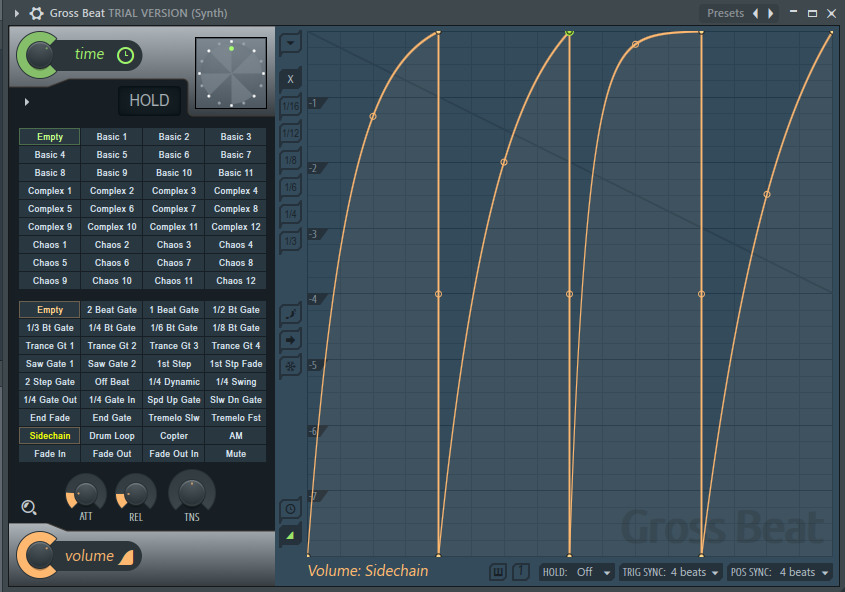
3. Drag the tension spots to get the desired effect
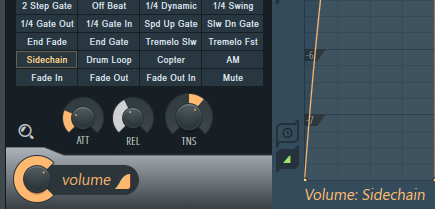
4. Use the attack (ATT), release (REL), and Tension (TNS) dials to further customise your sound.
What sounds to use when sidechaining?
There are no limits to the sounds you can use the sidechaining technique with. Most often, it will be used with a kick drum sample and a bassy synth or sample melody.
For a fantastic source of high quality samples to use in your music, check out RouteNote Create. RouteNote Create is a producer’s best friend with hundreds of thousands of samples and sounds as well as fire bass loops that you can use in your music, royalty-free.
With thousands of genres and vibes to explore, RouteNote Create offers the best place to find the new sounds to empower your unique mix. Explore their huge library of kick drum hits and bass loops and samples for use in your mix with a thumping sidechain effect.
Find your next sound at create.routenote.com.
Why use sidechaining?
Sidechaining is a common technique, found mostly in dance music but used across all types of genre – and even beyond music. Here are a number of reasons why using a sidechain technique can benefit your tracks:
- Create clarity and punch: By letting the kick drum duck the bass, you give it priority in the low end. This makes it clearer as well as more powerful in the mix. The kick cuts through and drives the beat harder.
- Add dynamic movement: Sidechaining isn’t for making the drums kick through. You can use it on synths, pads, and all manner of other instruments or vocals to give it rhythm. This can create an effect of movement, an interesting sound for a more diverse mix.
- Experimentation and creativity: Sidechaining isn’t just a technical tool; it’s a chance to get creative with your sound. Experiment with different trigger tracks, sidechain inputs, and settings to discover unique sonic textures to enhance your music in unexpected ways.
Do remain wary: It’s an interesting effect and can add a lot to your sound, but you don’t want to overuse it or make it too noticeable as a technique for bolstering your dance music.
When to use sidechaining
Now you know how to apply the effect, when should you use it? You can experiment with using the sidechaining technique for an infinite number of results, but there are a number of primary effects that the technique is best used for.
- Drums and bass: Sidechaining is most commonly used with the kick drum. It is used to duck other sounds, particularly low end tracks like the bass, to allow the kick to punch through. This drives the beat harder by emphasising the rhythm.
- Ducking vocals: Sidechaining is a common effect applied to vocals, allowing them to sit above the music. This is particularly effective when vocals come in from a musical section. Sidechaining is also used for spoken word, particularly when the speech is important like in adverts or trailers.
- Make synths rhythmic: Using a sidechain on your synths can bring their sounds in and out to the timing of other elements in your track. This can give extra swing and bounce to your track.
- Tweak it to your sound: Utilise sidechaining differently depending on your genre. For EDM it will provide punchy grooves with the kick drum, in singer-songwriter tracks it will offer subtle dynamics, and it provides impactful transitions in cinematic scores – to name but a few.
Sidechain in summary
Use this technique wisely to build a punchy mix or give some unique dynamic sound to your mixes. Be careful of overusing it or making the effect too dramatic, but ultimately – use it how you want and add it to your arsenal of production tools and techniques that take your tracks to the next level!