
Audio compression explained – A guide to compressor parameters in music production
Image Credit: Dylan McLeod
What’s compression in music? Get to grips with compressor parameters with our quick introduction for producers.
Previously we’ve explored the most common ways to use compression in music producing. But what does each specific setting on a compressor actually do?
What is music compression?
A compressor reduces the sounds in your mix if they go above a certain level.
There are generally six parameters on your standard compressor plugin: Threshold, Knee, Ratio, Attack, Release and Gain. Here’s a quick guide to them.
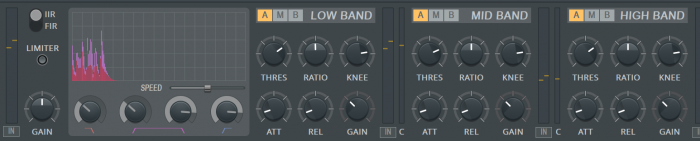
Threshold
The threshold sets the decibel level at which the compressor kicks in to act on the sound. The compressor won’t act on anything quieter than where the thresh is set.
The threshold is set so that the compressor is only triggered when the track hits unwanted louder peaks to even out the overall sound.
The setting is often listed as dB below peak (0db). So a setting of -6dB means that the compressor starts to act when the signal is 6dB below its 0dB mark. (A signal above 0dB will cause clipping.)
Knee
Use the knee knob to control how the compressor behaves while the input signal passes the threshold. The lower the setting, the more gradual the transition from compressed to uncompressed, which can make the compression sound more natural. A harder knee means a harsher transition.
The compressor’s knee setting controls the rate at which compression is applied just as the attack setting controls the speed.
Ratio
The ratio setting determines how much the compressor affects the signal – how much its reduced in volume. The ration 2:1 for instance means that for every decibel the signal goes above the threshold setting it is reduced by a factor of two. So if a signal goes 1dB over the threshold setting its output will only be 0.5dB louder.
Attack
Use the attack knob to control the attack time – how quickly the compressor kicks in to reduce the volume of the audio. The attack is measured in milliseconds, so the lower the set number, the faster the attack.
A slow attack makes instruments sound more natural. A fast attack will quickly control transients like a harsh guitar pick sound, but overuse can mean that the punch of a track gets lost.
Release
Release is the opposite of attack. Use the release knob to control how long it takes the compressor to continue affecting the audio after it’s dropped back below the threshold setting, and get the audio back to the normal volume.
Like the attack, the release is defined in milliseconds. The lower the number, the faster the release time. It’s sometimes referred to as decay.
Gain
Use the gain knob to adjust the level of the signal going out of the compressor.
Adding compression usually reduces the overall level of the sound – you use the gain control to raise the level back to where it was before as it went in. This is often referred to as ‘output gain’ or ‘make-up gain’. It’s listed in decibels (dB).
That’s the very basics of compressor parameters. The best way to get accustomed to each parameter is to experiment with each instrument you have on your track to get familiar with how the parameters affect the audio.
Have a play around and you might begin to see the potential of compressor parameters, and notice the difference compression makes to your producing.