
Mixing Basics: 808 Bass and Kick in FL Studio
Image credit: Sašo Tušar
Learn how to mix 808 basses and kicks into a track so that they shine with a heavy punch without detracting from other elements in your song.
Mixing is one of the most important steps. It brings your track together and allows each element to shine. It’s not as complicated to get started mixing as it might seem from the outside.
Let’s take a look at mixing an 808 bass to bring out its texture and then mix some other tracks around it to tackle the fundamentals of mixing. Check out our article on how to make an 808 bass with a built-in kick using FL Studio in our article here, as that’s what we’ll be using – but you can apply this guide to any instrument on any software.
How to mix your 808 bass
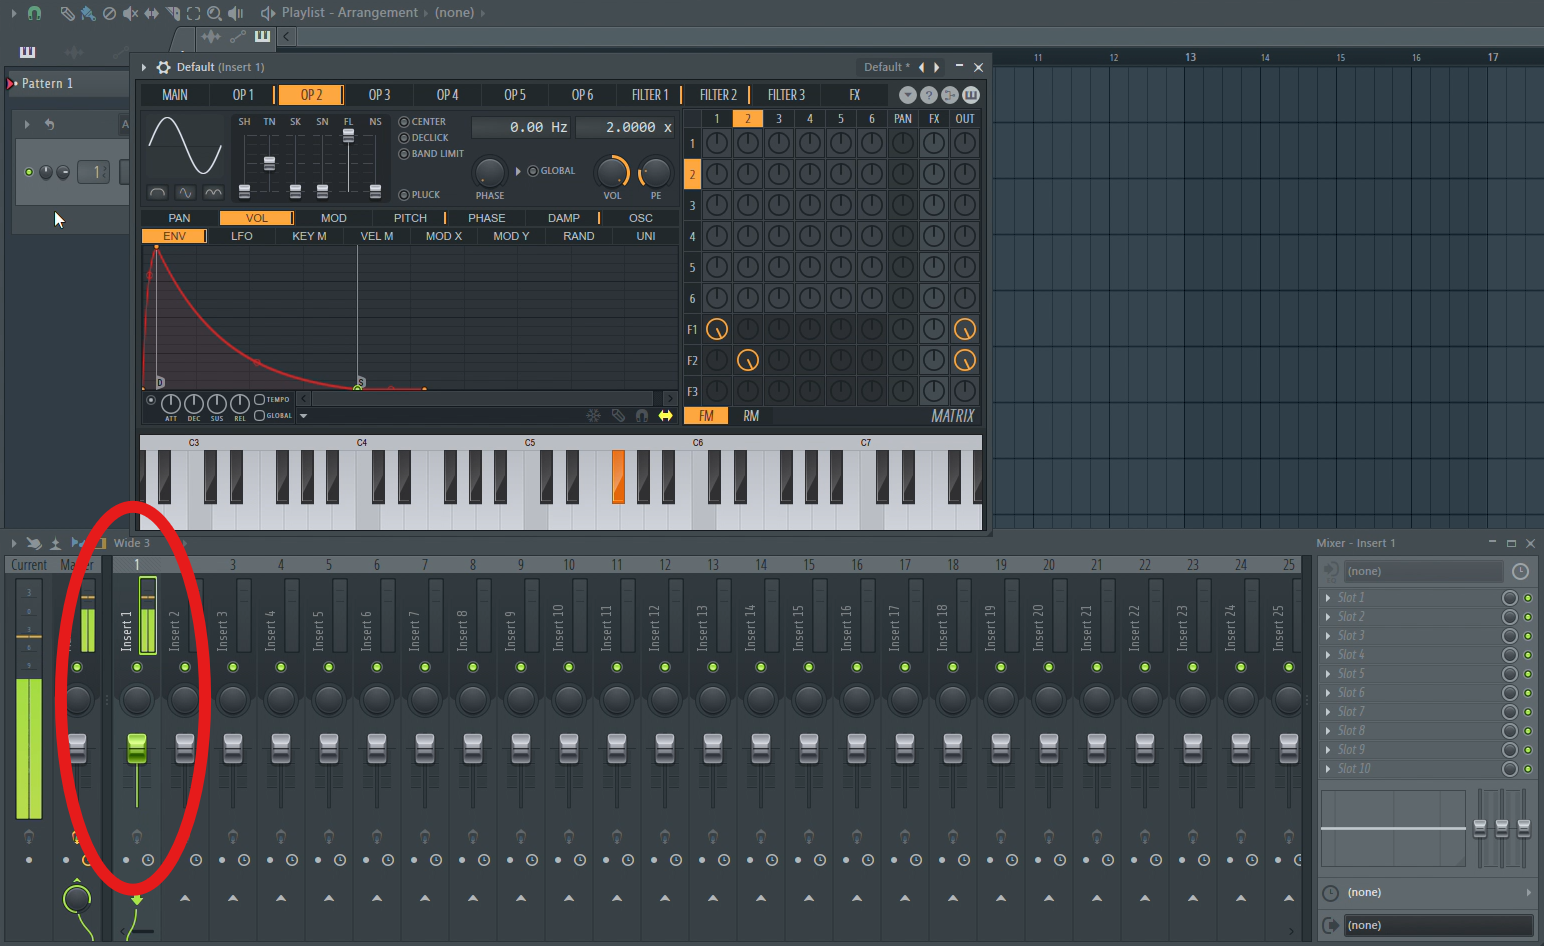
First up ensure you’re sending your instrument to a channel that we can use to customise it’s sound. We only have our 808 bass in Sytrus loaded at the moment so we’re going to go straight in to channel 1.
Now, we’re going to start our mix using distructor to get a simple cutoff. Turn off all of the other sections except Filter so that we can start customising the cutoff. Bring it down until the sound fits what you’re after, we’re just trying to bring out some of the highs to give our bass a more defined deepness to it here.
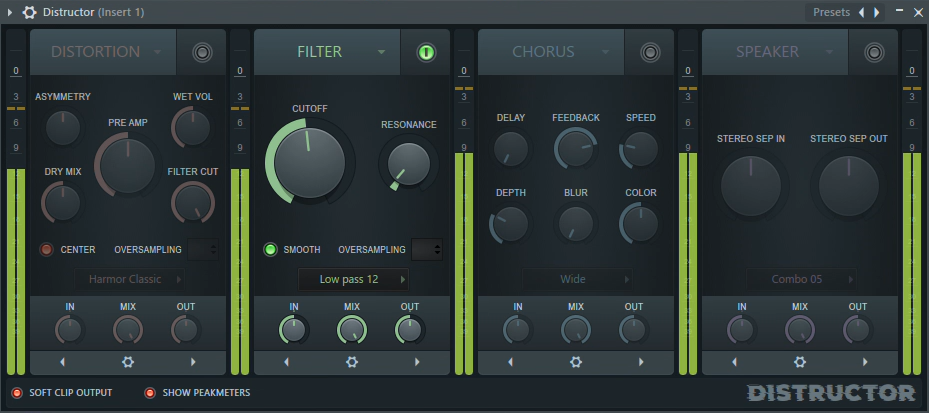
Play with the resonance to the desired effect as well. This can change the shape of your bass, but bringing it all the way done will give you a really solid, subby sound to play with.
Now we’re going to start equalising the bass. Open up an EQ plugin in your 808 bass’s channel – we recommend the Fruity Parametic EQ 2. This offers a really nice visual graph to play with. If we play our 808 bass we can now identify the frequencies that are making our synth shine.
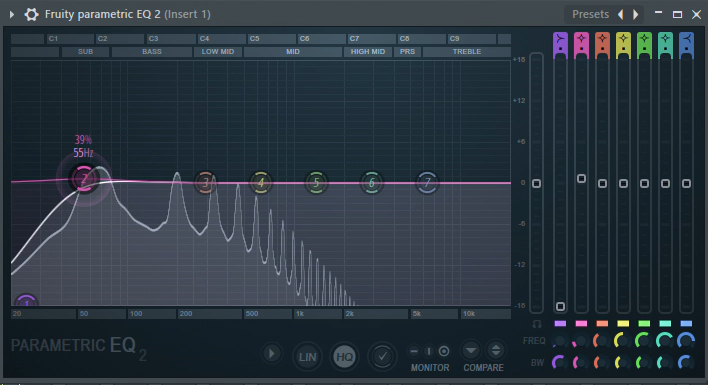
With the graph, we can boost or cut certain frequency ranges by dragging them up or down. You want to play with your graph to get the desired sound, but we’re going to walk you through a basic approach for a bass synth.
First, we pull down the very lowest frequencies to cutoff the inaudible extreme low end. This cleans up the sound a bit from the mud at the bottom and will save your sound if the bass is being blasted through speakers later.
Take notice of where the highest frequencies are. This is where the bulk of our sound and texture is coming from. Because we’re creating a bass synth and it has a low kick in it too, we’re largely taking up the sub and bass frequencies, around 30-100Hz, which begins to dip around the mids.
This means we can prioritise the sub and bass frequencies as we mix this instrument, leaving the mids and trebles for other channels to stand out in. Boosting these low frequencies a little bit will give this bass a really big punch.
We can also play with expanding or limiting the mids and trebles subtly to bring more texture into the sound or to take out noise for the sake of our other channels. The lower mids are especially going to have some nice texture for our synth but we just want to consider other instruments and vocals. We can always come back and bring things down or up depending on where our other channels land during mixing.

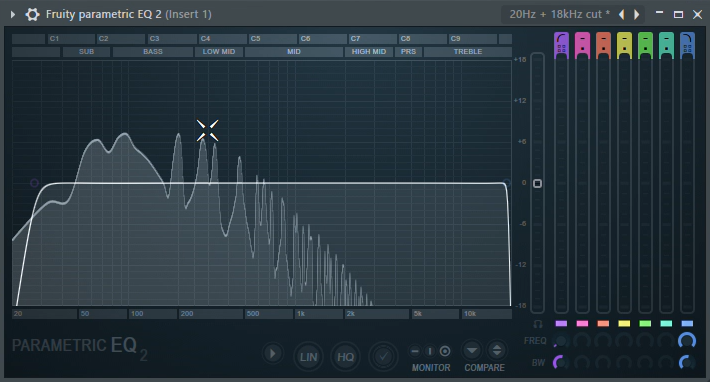
Finally, to really clean up our bass sound we can add another Parametric EQ 2. Go into presets and choose the 20Hz + 18kHz cut. Now, we can simply drag the leftmost handle to cut off any of the inaudible low end. Listen as you drag to find a sweet spot that doesn’t diminish your bass – around 27-28 should get rid of really low noise without impacting the colour of your synth.
To get an extra punch to your bass, you can use sidechaining to make the bass and kick boost when other channels aren’t high and then drop back down to allow things like vocals or other instruments to shine. Read our guide on sidechaining below for a significant boost to the punch of your low end.
There you have it! Play with effects like distortion and reverb to bring some more dynamics to your synth depending on the sound you’re looking for, but with this guide you should end up with a well mixed bass synth to start playing with and building into your tracks.
Let us know in the comments below what types of tutorial you’d like to see next.