How to export stems in FL Studio – a guide
Image Credit: Image-Line
Want to make stems of your tracks in FL Studio? Let’s break down the process of exporting separate tracks for mixing, mastering, or to use in your other music production projects.
User-friendly FL Studio makes it easy to export separate tracks from the DAW – so if you want to use your drumbeat in another track, you can track out the mixer tracks as individual “stems,” creating separate files for each.
You might for example want to use the kick drum beat in another song you’re producing. Once exported from FL Studio, you’re free to import the stems into whatever digital audio workstation you’d like, for final mixing and mastering, to send to an audio engineer, or use single tracks in future projects and remixes.
Let’s take a look at exporting all mixer tracks as individual Wave files; “wet” track outs with any effects you’ve applied still present on the track.
Follow these steps to export all the tracks on your mixer simultaneously, saving time so you don’t have to manually render stems out from FL Studio one by one.
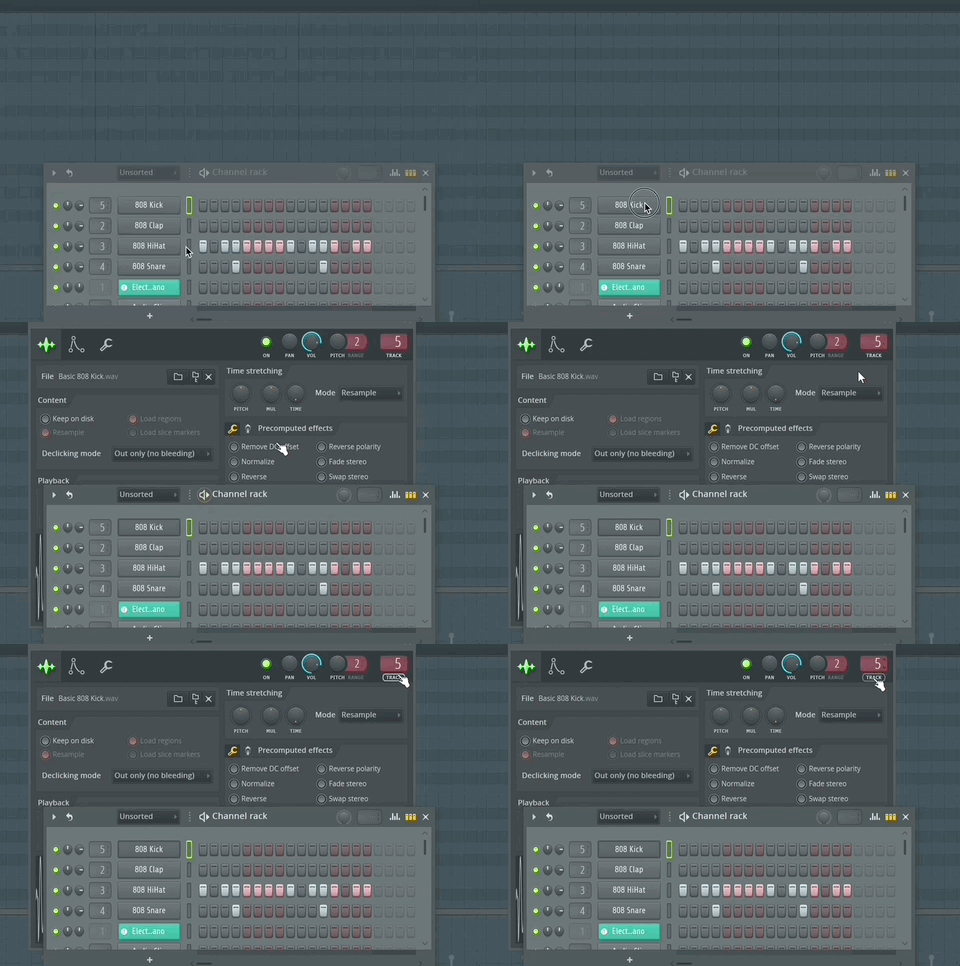
1. First, make sure you’ve sent every track on the playlist to its own mixer channel.

That way, no sounds will be missed from the arrangement.
You can see which mixer channel your track is sent to from the channel rack.
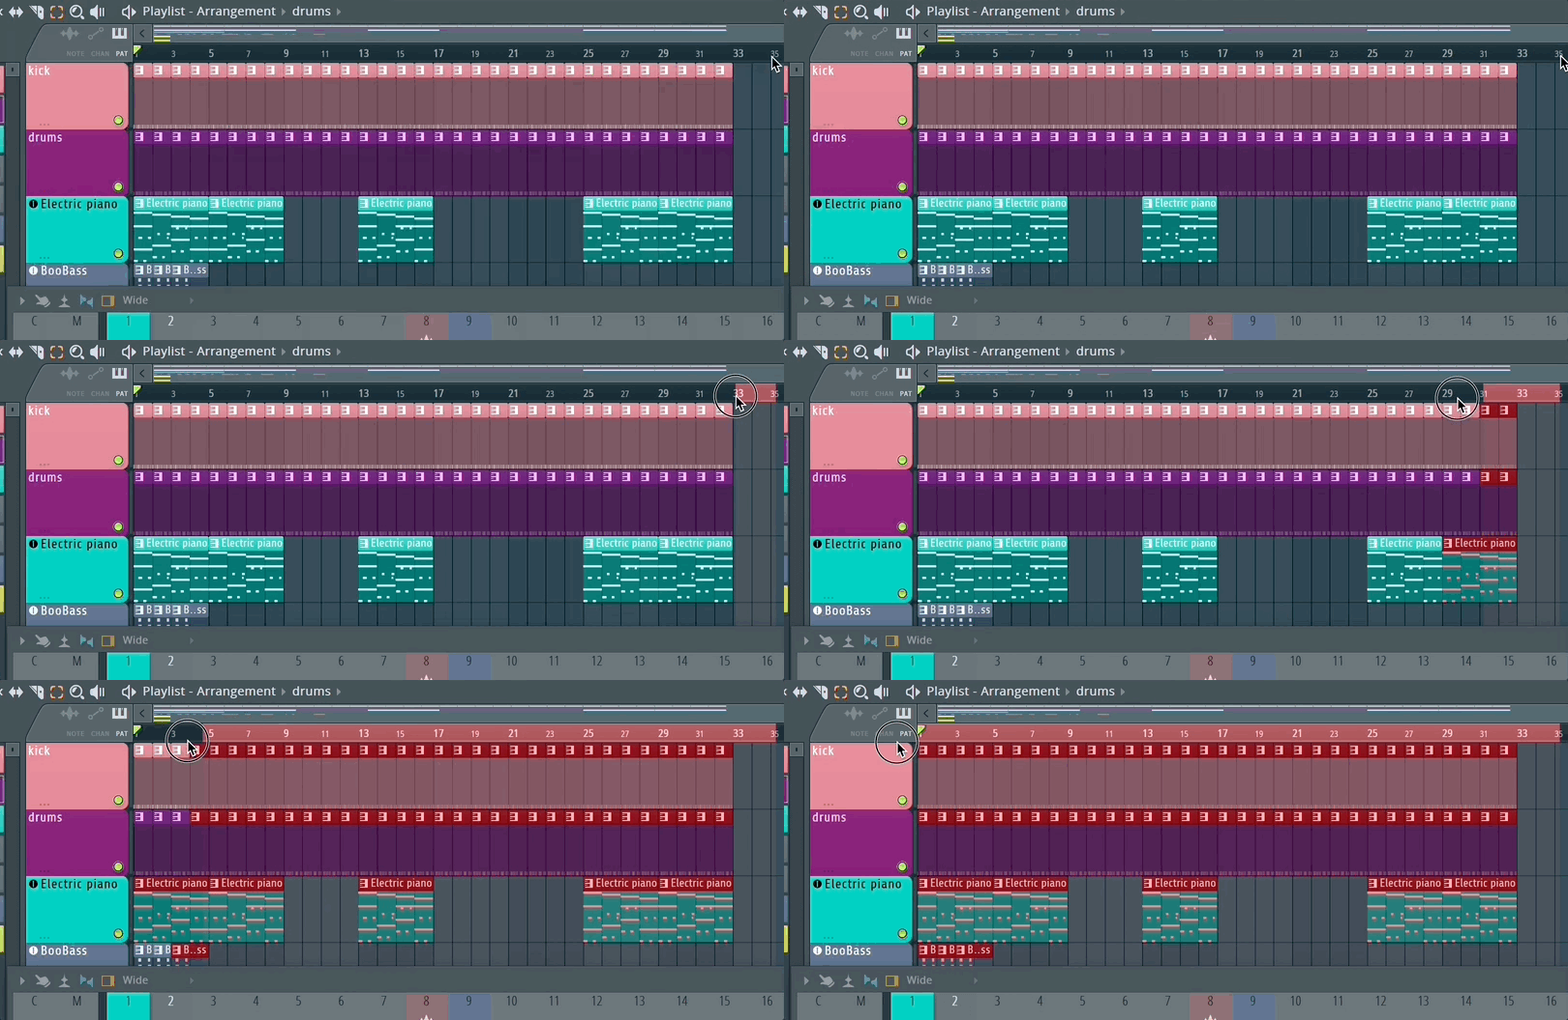
2. Select the whole of your song, including extra space at the end to catch any tailing-off effects. Do this by clicking and dragging along the Timeline at the top of the playlist:

3. Go to File – Export – wave file
4. In the window that opens, choose a folder to export to or create one (name it “Stems” or something similar)
5. Make sure you’ve given your project a sensible name, and click “Save”
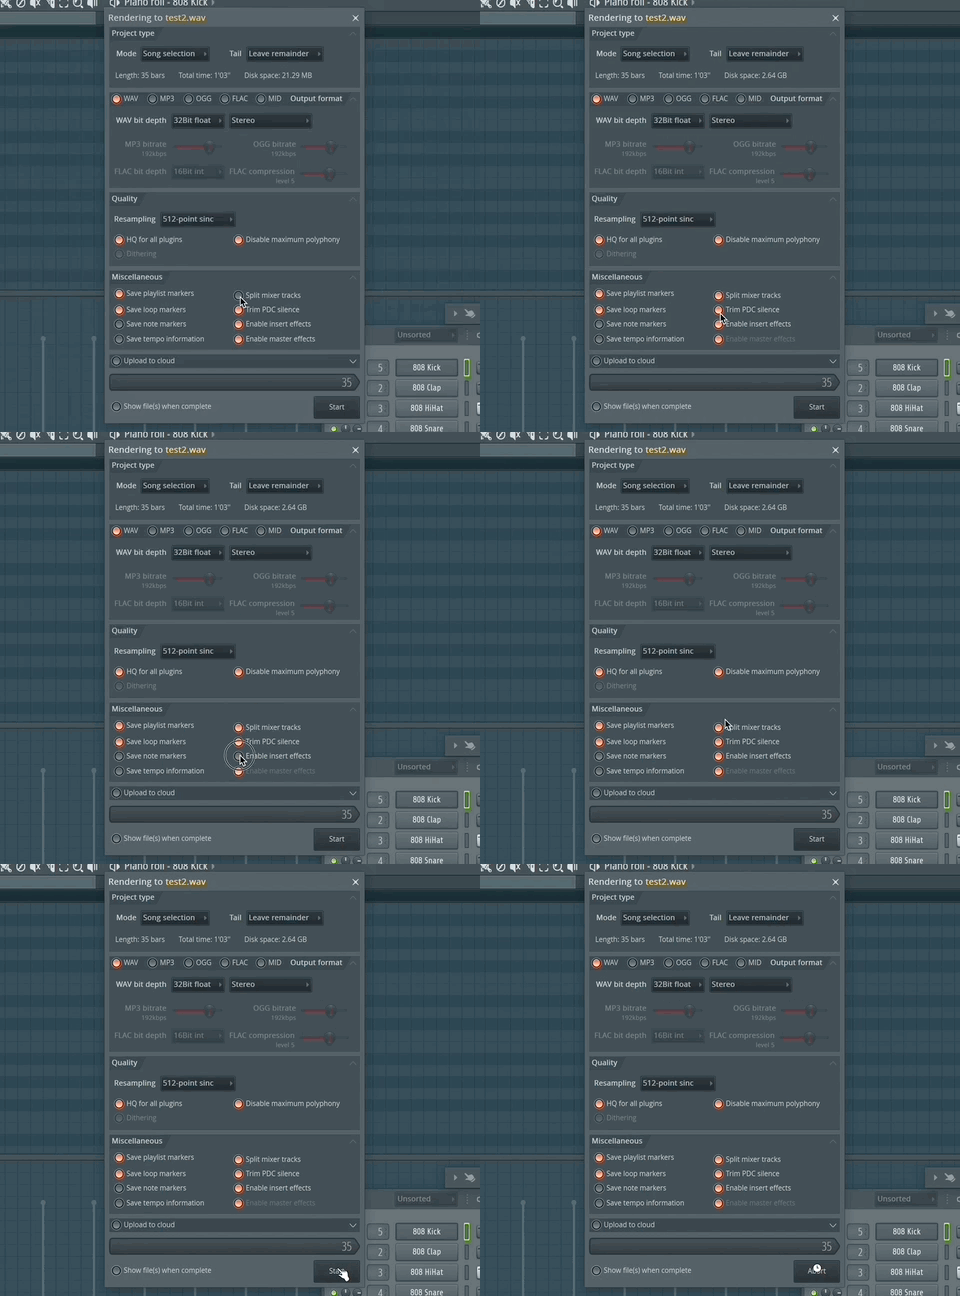
6. In the “Rendering” window that opens make sure that “Enable Insert Effects” and “Split Mixer Tracks” is selected:

There are various options available, such as choosing a bit depth.
“PDC Silence” for example keeps all your tracks in sync by trimming unwanted silence at the beginning of your tracks – so keep that on.
7. Hit “Start.”
All your individual tracks will now be separately saved to that the folder you chose. You can drag and drop them into a fresh project on FL Studio and they’ll line up in the same arrangement.
How do I export stems from FL Studio without effects?
If you want the dry mix of your tracks – without the reverb and other effects you’ve applied – the process is similar. Stay organised by making two folders in your “Stems” folder, named “Wet” and “Dry.” Then follow the same process, except save to your “Dry” folder, and uncheck the “Enable Insert Effects” setting.
Sending the tracks to someone else to mix for you? It’s a good idea to turn off any effects settings that aren’t creative sound design choices – like compressors and EQs – so that the engineer can make their own decisions about what sounds best. Keep effects like distortion and chorus turned on. Always ask the audio engineer what they’d prefer to work with.
How do I export the whole track?
If you’re happy with everything in your mix and you want to export the whole track for mastering, not split into loads of individual audio tracks, follow the exact same process but untick “Split Mixer Tracks.”
What quality do I export stems in on FL Studio?
If you’re listening casually or exporting for CD audio, then 16bit is fine. If you’re sending to an audio engineer, ask what they’d like, but 32Bit Float is the best quality for stems if you’re planning on editing the audio further or reusing a sweet little loop you’ve made.
