How to queue and edit what’s playing next on Apple Music
Image Credit: Apple
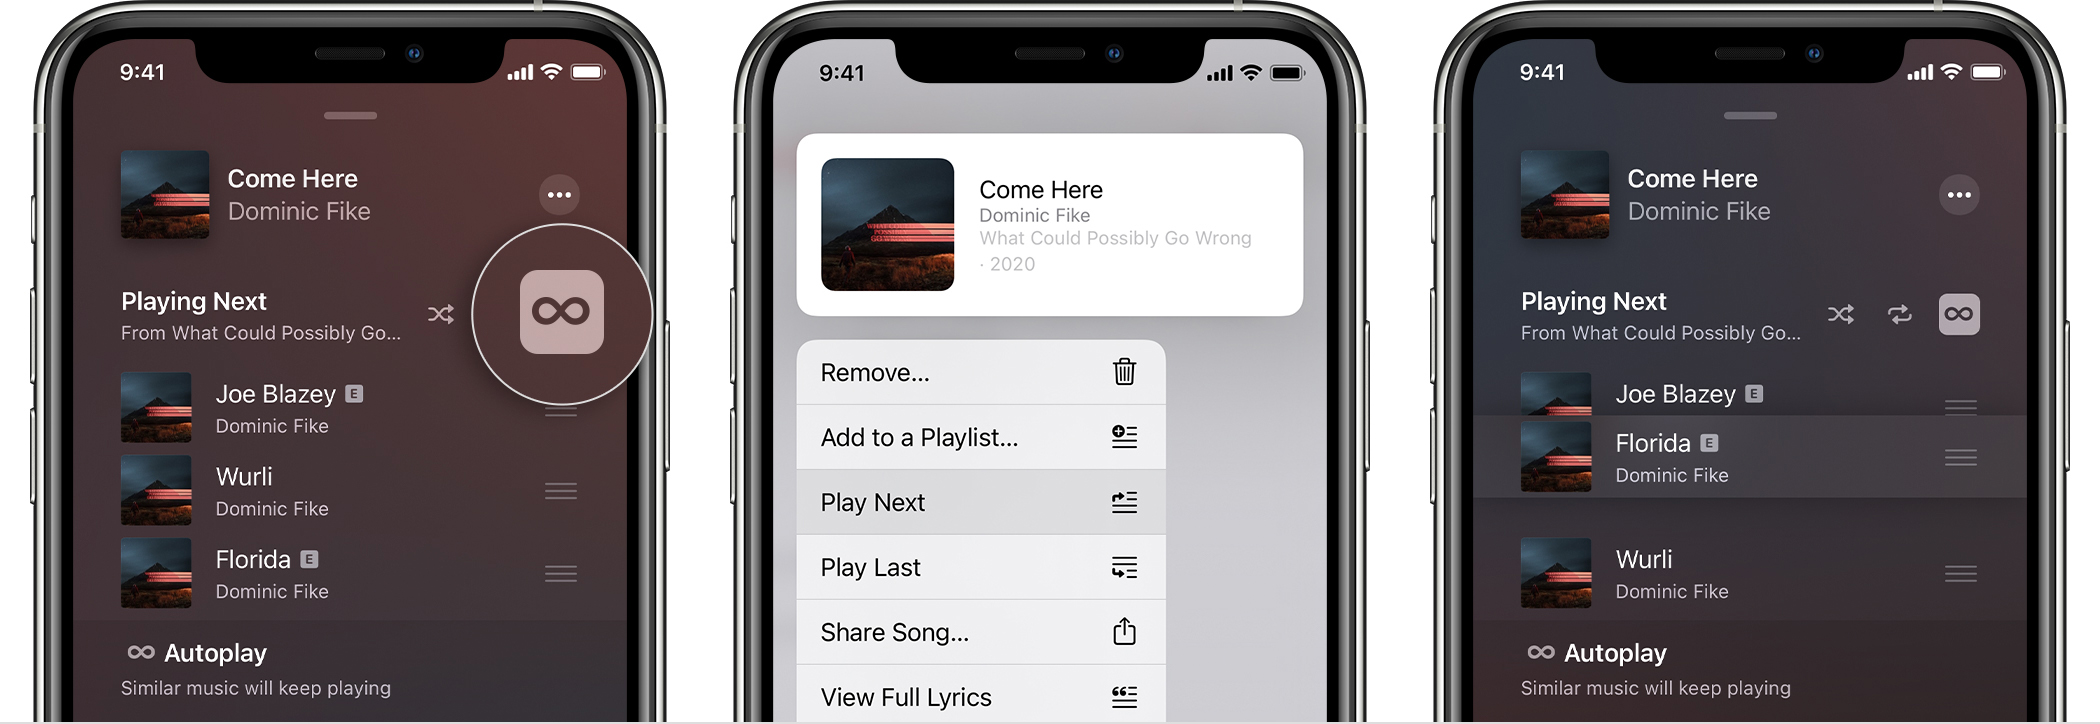
See upcoming songs, add music to the queue and view/delete your recently played tracks on Apple Music on the mobile and desktop apps.
How to control Apple Music like a pro. Today we look at the basics of Apple Music. Here’s how to view and choose what plays next on the music streaming service.
Mobile – iPhone, iPad and Android
- See what’s playing next
- Tap the player to open Now Playing
- Tap
 in the lower right corner
- Jump to a track
- Tap the track
- Rearrange
- Drag
 to the right of a track
- Drag
- Remove a songs
- Swipe left on a track
- Tap Remove
- View recently played music
- Swipe down on the queue to see playing history
- Remove music from History
- Tap Clear
- Hide the queue
- Tap
 in the lower right corner again
- Tap
- Add to the queue
- Touch and hold a song, album, playlist or video
- Play Next – adds it as the next item in the queue
- Play Last – adds it as the last item in the queue
- Play a song immediately whilst a queue is active
- Tap the song
- Keep – keeps the queue
- Clear – clears the queue
Autoplay continues playing similar music once the queue has ended. Autoplay is on by default. You’ll find the Autoplay queue below Playing Next. Toggling Autoplay on one device toggles it on all devices signed in to the same Apple ID.
- Turn off Autoplay
- Tap
 in the queue
- Tap
Desktop – Mac
- See what’s playing next
- Click
 in the upper right corner
- Click
- Jump to a track
- Double click the track
- Rearrange
- Drag and drop tracks into their desired place
- Remove a songs
- Mouse over the song
- Click
 to the left
- Remove all songs
- Click Clear
- View recently played music
- Click History
- Turn off Autoplay
- Click

- Click
- Hide the queue
- Click
 in the upper right corner again
- Click
- Add to the queue
- Click the three dots in the lower right corner of a song, album, playlist or video
- Play Next – adds it as the next item in the queue
- Play Last – adds it as the last item in the queue
